IllusoryThrall's Sims 4 Hub
- Challenges, Tips & Stories
Go back to the Main Page | Go Back to Getting Started
Switch One | Switch Two | Switch Three | Switch Four | Switch Five | Switch Six
You now have an heir and you’re ready to move on to Switch Six Split the household, move your heir into, and reduce funds to 0 just like we did in the last Switch. (again, “testingcheats on”, “money 0”, then “testingcheats off”)
Okay, now your’re ready to play and have three goals:
One: (once again) get your apartment value up to within the target funds amount (That’s explained in a minute) and move to the next apartment until you get to the last apartment.
Two: Get to the Mansion Baron Aspiration in your last apartment (the penthouse) I leave which sim to do this on up to you. Even any heirs you have are fair game, unless you’re planning to use them for another challenge after this.
Three: Get your heir to Young adult stage. If you’re planning on doing another challenge after this, it’s recommended to have your heir unplayed, but I leave that up to you. Once you’ve got your Mansion baron done, your community lot built, and your heir aged up… you won!
I will warn you, this is a HARD challenge, no matter which difficulty you’re playing. As such, I will give you a few tips:
The apartments for this Switch are as follows:

District: Spice Market
Lot Traits: Historical, Haunted
Rent per week: 600
Deposit: 1,000
Target Value: 8,000 - 10,000
This is designed for 1 bedroom, 1 bath, but at least it’s nicer than a lot of the other Switches’ first apartment. You likely won’t have any trouble with the “haunted” ghosts – I sure didn’t.. but even if they break some stuff, it’s better than a lot of the alternatives.


District: Fashion District
Lot Traits: Quake Zone, Party Place
Rent per week: 700
Deposit: 2,100
Minimum Move in Amount: 8,000 - 700 - 2,100 = about
5,200 to spend on furniture.
Target Value: 20,000 - 30,000
Designed for 2 bedrooms, 2 baths, this has plenty of room and a lovely balcony. For those on extreme, wall placement is kinda weird, but you’ll figure it out. Because the next apartment has a bit of a hefty initial price tag, you’ll probably spend longer here than you have on other second apartments.

District: Uptown
Lot Trait: Chef's Kitchen
Rent per week: 3,500
Deposit: 15,500
Minimum Move in Amount: 20,000 - 3,500 - 15,500 = about
1,000 to spend on furniture.
Target Value: 60,000 - 100,000
Designed for 4 bedrooms, 3 baths, this apartment will probably require you to save more than the target from the last apartment to move into and still live fairly comfortably. However, you’ll find you have plenty of space to work with and a floor plan that’s at least tolerable. If you’re playing on extreme, you have SO much space that I found it difficult to even conceptualize what to do with it all.


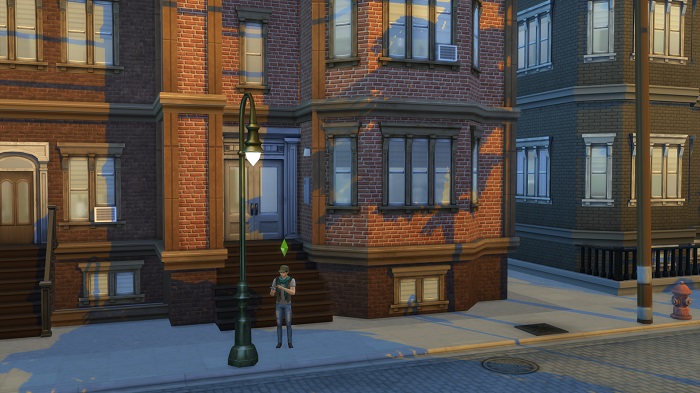
District: Fashion District
Lot Traits: Party Place, Sunny Aspect
Rent per week: 0 (you'll have normal bills instead)
Unfurnished Purchase Cost: 105,849
Bulldozed Purchase Cost: 31,669
Minimum Move in Amount: *See below
Target Value: 350,000
Designed for 3 bedrooms, 3 baths. This one’s going to cost you a pretty penny if you’re playing on normal difficulty and have to buy it unfurnished.. but then again, your goal is to have it be worth 350k, so 105k as a base price isn’t too bad. You’ll want to remember to save up enough to not only buy it, but save enough to also buy some stuff to furnish it as well. *On extreme, you can move in as soon as you’re finished with the previous apartment since the lot is bulldozed. However, on normal mode, remember you’ll need more than 105k value (value = your apartment worth + your household funds) to move in – and that won’t include furnishings.
Just like last time, if you’re doing the challenge on Extreme difficulty, as soon as you achieve Mansion Baron with your chosen sim, you’re free to go build your very own lounge. This also opens this lot for traveling to (so long as you have 1k or more in the bank). You’ll be building your lounge on this lot in San Myshuno:

Since there’s other lounges in other neighborhoods, you are also free to build whatever you like here.
You should be very proud of yourself, this is not an easy challenge. If you finished it on “Normal” maybe you might try going back and try it on “Extreme” and see if you can complete it that way. Every time you play this challenge, things will be just a bit different, so it’s fun to replay.
Go back to the Main Page | Go Back to Getting Started
Switch One | Switch Two | Switch Three | Switch Four | Switch Five | Switch Six
![]()
 November 2025 Dev DiarySuperSweetBot Commands for Mods & BroadcastersOctober 2025 Dev DiaryProgress Report!Hacking Situation ResolvedHey all…Not So Berry Updating
 Jaynie’s Gems: By-The-NumberToday