IllusoryThrall's Sims 4 Hub
- Challenges, Tips & Stories

Updated 4/5/2023 –
(Base game + Island Living necessary, all other packs are optional)
This challenge, like my Apartment Switch Challenge, is based in one expansion. the full version (below) uses traits and jobs from other expansions, but I was careful to include directions for replacing the traits or jobs if you don’t have those packs. At it’s heart, this is a story of a family that starts from a single female human sim who has a dream to be a mermaid and pass on her legacy. It’s based on a Matriarchy line, but I suppose you could change it to all males if you really wanted. Each generation is based on a color, and starts completely over on a new lot in Sulani. Eventually, your whole Sulani town will be filled with houses you built over the course of the challenge. The fun part about this challenge, is that not only do you have different goals for each challenge, it gets just a little bit harder each generation. It is actually an 11 generation challenge, because there’s a Generation Zero – which is the human sim who has to find out how to become a mermaid.
(more…)Main Rules Page
Updated through High School Years 1/8/23
For each generation: pick two sets (for a married couple) or one set (for a single). If you elect to move in another adult, you can pick another set for them, but remember the more sets you pick, the more difficult the generation will be. Also, always make sure to leave room for your heir. The only house where you can kick someone out that you moved in is the “Ghostliness” house.
I have created an up-to-date checklist you can print out or copy for your files for all of the goal sets. >> here <<. Also, I have moved my “cheat sheet” list of all things simlish to my tools section, but it may very well be helpful for this challenge.
*Feel free to make use of the Tiny Living expansion pack whenever you feel like it. I wasn’t able to come up with a goal set for it, because that pack seems very build-oriented, and this is a play-oriented challenge.
(The first seven are listed first because they’re good ones to start with for making money to get your house up and running)
Get to Level 10 in the Writer career (Author)
Master the Writing Skill
Complete the Bestselling Author Aspiration
Write at least 2 Excellent Books in Every Genre (This includes the emotional books!)
Write 5 Books of Life and Bind Them to Sims
Get to Level 10 in the Writer career (Journalist)
Master the Writing Skill
Write Articles About 20 Sims
Make 20 Friends
Get to Level 10 in the Painting Career (Patron of the Arts)
Master the Painting Skill
Complete the Painter Extraordinaire Aspiration
Decorate with At Least One of Each Painting Type
Decorate with At Least One of Each Emotional Painting
Get a Deal from the Agent at Least 10 Times
Get to Level 10 in the Painting Career (Master of the Real)
Master the Painting Skill
Master the Photography Skill
Take and display 25 Outstanding Quality Photos
Get to Level 10 in the Gardener Career (Botanist) (Seasons)
Complete the Freelance Botanist Aspiration
Master the Gardening Skill
Collect all plants (except flowers and granite falls herbs) for your garden (The UFO plant is optional, simply because it’s so hard to get.. you will need it for the achievement, though.)
Grow a Cowplant and keep it alive until the end of the generation (does not need to be the same Cowplant you started with)
Have at least 5 Perfect Plants
Splice a plant to get a new type of plant
Get to Level 10 in the Gardener Career (Florist)
Master the Gardening Skill
Master the Flower Arranging skill
Collect all flowers for your garden
Make and display at least “good” versions of all Flower Arrangements possible
Master the Fishing Skill
Get to level 3 of the Fishing Career (Island Living)
Complete the Angling Ace Aspiration
Complete the Fish collection
Visit and fish from all three hidden locations: Sylvan Falls, Forgotten Grotto, and the Deep Woods (they do NOT have to opened this generation, they could have been opened by another generation previously) (Deep Woods is Outdoor Retreat)
Mount and Display one fish of each type
Complete the Outdoor Enthusiast Aspiration
Master the Herbalism skill
Complete the Insect collection
Find and Identify all herb plants from Granite Falls for your garden
Go camping at least 5 times
Create All Herbalism Recipes in Perfect Quality
Consume every type of toxic plant
Complete the Curator Aspiration
Complete and display at least 3 collections from the following: Frogs, MySims Trophies, Metals, Crystals, Elements, & Fossils (more is better!)
Breed frogs at least 20 times
Harvest at least 50 wild plants
Get to Level 10 of the Astronaut Career (Space Ranger)
Complete the Nerd Brain Aspiration
Master the Fitness Skill
Master the Rocket Science Skill
Build a Rocket (Apollo Rocketship)
Add all Rocket Science Upgrades to your Rocket
Go on at least 20 Space Missions
Get to Level 10 of the Astronaut Career (Interstellar Smuggler)
Master the Fitness Skill
Master the Rocket Science Skill
Build a Rocket (Retro Rocketship)
Complete 2 collections: Space Rocks and Aliens
Get to level 10 of the Athletic Career (Professional Athlete)
Master the Fitness Skill
Study Opponents at least 20 times
Get to level 10 of the Athletic Career (Body Builder)
Master the Fitness Skill
Complete the Bodybuilder Aspiration
Become both max thin and fat within your sim’s lifetime (Can use the aspirations purchases to complete this)
Get to level 10 of the Business Career (Investor)
Complete the Fabulously Wealthy Aspiration
Complete the Mansion Baron Aspiration
Master the Logic Skill
Research Stocks at least 20 times
Get to level 10 of the Business Career (Management)
Master the Charisma Skill
Make at least 20 Business Calls
Own a Retail Store worth at least 100,000 simoleons
Have 3 top level employees
Have Spent 10,000 points on retail perks.
Get to Level 10 in the Criminal Career (Boss)
Master the Mischief Skill
Complete the Public Enemy Aspiration
Have 30 Enemies
Get to level 10 in the Criminal Career (Oracle)
Master the Programming Skill
Master the Mischief Skill
Complete the Master of Mischief Skill
Wreck Up 5 Houses Using the Tormentor Trait
Successfully Use All Voodoo Interactions at Least Once
Get to level 10 of the Critic career (Art Critic)
Complete and Display the Snow Globes and City Posters Collection
Perform as a statue for at least two hours
Complete the City Native aspiration
Win a Karaoke Contest
Have level 10 Singing skill
Travel to all festivals at least once
Get to level 10 of the Critic career
Earn the Spice Hound trait
Earn the Chopstick Savvy trait
Learn all recipes and cook each in excellent quality
Eat a pufferfish nigiri and survive
Complete the Grilled Cheese aspiration
Get to Level 10 of the Culinary Career (Chef)
Master the Cooking Skill
Master the Gourmet Cooking Skill
Complete the Master Chef Aspiration
Cook All Base Game Recipes in Excellent Quality (Except Ambrosia & Grilled Salmon)
Own a 5-star Restaurant on a Lot Worth at Least 100,000 Simoleons
Create all Experimental Foods
Complete the Experimental Food Photo Collection
Get to Level 10 in the Baking Skill
Bake All Baking Recipes at Least Once (this includes those in the fridge and the cupcake machine)
Run a Successful Bakery on a lot worth at Least 100,000 Simoleons
Own and use a Cupcake Machine
Master the Mixology Skill
Complete the Master Mixologist Aspiration
Create All Base Game Drinks in Excellent Quality
Mix at least 100 drinks
Get to Level 10 in the Entertainer Career (Musician)
Complete the Musical Genius Aspiration
Master the Guitar Skill
Perform Excellent Guitar Song at a Gold Level Party 2 Times
Master the Violin Skill
Perform Excellent Violin Song at a Gold Level Party 2 Times
Master the Piano Skill
Perform Excellent Piano Song at a Gold Level Party 2 Times
Master the Media Production Skill (Get Famous)
Produce 5 songs using the Mixmaster Station (Get Famous)
Sign to a music label (Get Famous)
Get to Level 10 in the Entertainer Career (Comedian)
Master the Charisma Skill
Master the Comedy Skill
Complete the Joke Star Aspiration
Have 10 Excellent Comedy Routines
Have 3 Excellent Long Comedy Routines
Perform a Excellent Comedy Routine at a Gold Level Party 2 Times
Rank up as a Freelancer – Writer
Master the Writing Skill
Complete the Postcard collection
Rank up as a Freelancer – Artist
Master the Painting Skill
Rank up as a Freelancer – Programmer
Master the Programming skill
Get to Level 10 in the Military Career (Officer)
Master the Charisma skill
Spar with the dummy at least 20 times
Share War stories at least 5 times
Give orders or practice giving orders 5 times
Get to Level 10 in the Military Career (Covert Operator)
Master the Logic Skill
Plant at least 10 bugs on sims and listen in on them
Get to level 10 of the Politician career (Charity Organizer)
Master the Charisma skill
Collect 20,000 Simoleons in donations
Donate at least 5000 to Charity
Get to level 10 of the Politician career (Politician)
Master the Charisma Skill
Make 10 Friends and 10 Enemies
Lead at least 10 protests
Secure 20 votes
Get to level 10 of the Actor Career
Complete the Master Actor aspiration
Complete the World-Famous Celebrity aspiration
Finish at least 15 Gigs at the Gold level
Get to Level 10 in the Detective Career
Listen to all radio stations and watch all TV channels in the base game
Solve 6 cases
Go on Patrol at least 5 times
Get to Level 10 in the Doctor Career
Deliver a baby
Successfully diagnose and treat at least 5 patients
Complete at least 3 surgeries
(Wellness and Spa Day goals moved to a separate Goal Set 1/6/22)
Get to Level 10 in the Science Career
Invent all the Inventions
Have a Sim Get Pregnant from an Alien
Perform Every Possible Upgrade on an Invention
Complete and display at least 3 collections from the following: Elements, Geodes, Microscope Prints and Space Prints Collections
Visit Sixam at least twice
Make and display at least one of each non-tainted Serum
Get to Level 10 in the Secret Agent Career (Diamond Agent)
Master the Logic Skill
Get to Level 11 in the Secret Agent Career (Villain)
Master the Logic Skill
Own a 5-star Vet Clinic on a Lot Worth at Least 100,000 Simoleons
Have All Vet Perks
Level 10 Veterinarian skill
Complete the Friend of the Animals aspiration
Have a pet with 1500 Simstagram followers
Level 5 Pet Training skill
Train one of your dogs with all tricks possible
Have one of your dogs have puppies
Own a Woohoo Bush (cats will check this for feathers)
Complete the Feathers Collection
Have one of your cats have kittens
Get to level 10 of the Social Media career (Internet Personality)
Master the Media Production Skill
Produce 10 “good” videos using drones and the Video Station
Advertise Major Product 5 times
Have 25 Million followers
Get to level 10 of the Social Media career (public Relations)
Make 20 Friends
Network with Journalists 10 times
Persuade 10 sims to do something (ex.: dress like a raccoon)
Get to level 10 of the Style Influencer career (Trend Setter)
Make five female and five male trends
Get to level 10 of the Style Influencer career (Stylist)
Make over 15 sims
Get to level 10 of the Tech Guru Career (Start-up Entrepreneur)
Master the Programming Skill
Complete the Computer Whiz Aspiration
Get to level 10 of the Tech Guru Career (eSport Gamer)
Master the Video Gaming Skill
Win 5 Game Tournaments
Livestream 20 times
Complete the Soulmate Aspiration
Have a gold Wedding
Complete gold Dates for aspiration
Complete the Serial Romantic Aspiration
Have a sim “first kiss” three times at a single social event
Get married at least five times
Kill off at least five spouses (Method is up to you)
Be Divorced at least Once
Have 20 Romantic Interests at the Same Time
Woohoo with 50 unique non-player sims
Have at least one bronze wedding and one silver wedding
Complete the Big Happy Family Aspiration
Complete the Successful Lineage Aspiration
Complete the Super Parent Aspiration (Parenthood)
(This would be a good one to get five aspirations on one sim – suggestions being Soulmate and Mansion Baron, which, by this point should auto-complete)
(Also, try to get the 12 traits on one sim during this set. Buy traits through aspiration rewards.)
Level 10 Parenting skill (Parenthood)
Have at least four kids
Complete the Friend of the World Aspiration
Have 20 BFFs (non-player)
Complete the Party Animal Aspiration
Have a Gold Medal in All Easily Available Social Event Types (provided you have the pack needed) – Keg Party, Birthday Party, Black & White Bash, Spooky Party, Costume Party, Dinner Party, House Party, Weenie Roast, and Kava Party.
Have a sim complete 10 whims at a single social event
Bowl a perfect 10 frame game of all strikes on the Bowling Lane (Bowling Night)
Master Bowling Skill (Bowling Night)
Complete the Leader of the Pack Aspiration
Take over a Club by either Turning Members Against the Leader or by Convincing the Leader to Step Down
Buy All the Club Perks (including the objects and CAS parts, even if you have no plans to use them) on a Club that either you start or has less than 100 perk points when you join.
Master the DJ Mixing Skill
Master the Dancing Skill
Earn 1,000 Simoleons from DJ Booth Tips
Upgrade a DJ Booth with All Upgrades
Perform All Dances in a Club
Complete the Renaissance Sim Aspiration
Master the Handiness Skill
Create All Woodworking Objects in Excellent Quality (this includes Guitars and Violins, which require you to get to at least level 8 in the respective skills)
Upgrade 20 Objects
Decorate with 10 Woodworking Objects
Complete the StrangerVille Mystery aspiration
(Not doing any more recommendations to avoid spoilers here.)
Complete the Archaeology Scholar and Jungle Explorer aspirations
Complete the Ancient Omiscan Artifacts and Omiscan Treasures Collections
(While working on this one, my suggestion is to add a desk and computer to the main Market building in Selvadora, you’re probably going to need it to cure poisons.)
Master the Archaeology skill
Master the Selvadoradian Culture skill
Swim while the weather is freezing
Max relationship with the bees
Became friends with Patchy, the Flower Bunny and Father Winter
Have at least 3 successful big holidays (which includes at least 4 traditions)
Have at least 5 successful mini-holiday (which includes 1 tradition)
Have a child with Father Winter
Complete each Holiday Tradition at least once
Complete the Easter Egg and the Holiday Cracker Plushies Collections
Become a vampire
Complete the Vampire Family aspiration
Complete the Master Vampire aspiration
Master the Pipe Organ skill
Take the Sleep of the Undead Weakness and Withered Stomach
Have at least one vampire and one human heir (to allow you to do whichever set you want next, the human heir may need to be adopted)
(This is a good one to do right after set 59)
Become a Vampire
Complete the Good Vampire aspiration
Take the Guilty Drinker weakness
Cure your heir of Vampirism
Master the Vampire Lore skill
Die by Any Method Except Old Age
Join the Household as a Ghost
Be Revived by Ambrosia
Throw a Gold Level Spooky Party (Spooky Stuff)
Carve Every Possible Pumpkin in Every Possible Color, and Preserve Them (the hardest pumpkin, as well as the Preserve interaction, are unlocked at Handiness level 5) (Spooky Stuff)
Be friends with the Grim Reaper
Have eight ghosts in the household at the same time (Use the “ask to move in” interaction, not the household management)
Resurrect at least one of them
Unlock the Grilled Cheese Aspiration
Paint at least 5 different grilled cheese paintings
Summon Grilled Cheese more than 10 times
Get to Level 10 of the Conservationist Career (Environmental Manager branch)
Prepare and Submit 10 Grant Applications
Get the Islands of Sulani to their most Pristine state (level 3)
Write 5 Conservation Papers
Shoot 5 Nature Documentaries
Complete and Display the Seashell Collection (by beach-combing)
Get to Level 10 of the Conservationist Career (Marine Biologist Branch)
Befriend the White Dolphin & Rename it.
Survey the Ocean Floor 10 times
Shoot 5 Nature Documentaries
Complete and Display the Buried Treasure Collection
Take and Display all 10 Underwater Photos
Become a Mermaid using Mermadic Kelp
Befriend the Azure Dolphin & Rename it.
Collect, Mount (or Bowl), and Display all 14 new Island Living Fishes
Cast Siren’s Lullaby on 5 separate sims
Cast Siren’s Call twice
Summon an Ocean Threat
Call both a rainstorm and a thunderstorm
Have at least one Mermaid and one Human Heir
Get to Level 3 of the Diver Part-Time Career
Get to Level 3 of the Lifeguard Career
Patrol for Danger 10 Times
Complete the Beach Life Aspiration
Befriend a grey Dolphin & Rename it.
Rank up as a Freelancer – Programmer
Master the Photography skill
Hire 5 different Fashion Models
Earn the ClickShot P10 Mirrorless Camera (by maxing the Freelance Photographer performance meter)
Become a Spellcrafter (or be born one)
Complete the Spellcraft & Sorcery aspiration
Learn and cast all Practical Magic spells (9 spells)
Use the Rite of Ascension on another sim, turning them into a Spellcaster
Learn and cast all Mischief Magic spells (7 spells)
Learn and cast all Untamed Magic spells (8 spells)
Create a clone of yourself with the Duplicato Spell
Win 5 Duels for rewards (artifacts, ingredients, or knowledge – friendly duels don’t count)
Become a Spellcrafter (or be born one)
Complete the Purveyor of Potions aspiration
Learn and Mix each of the 15 potions (will require collecting all of the proper ingredients!)
Complete the Alchemy Perk Line
Earn the Ancient Bloodline Trait (will require at least third generation Spellcaster)
Complete the Magical Artifacts Collection
Collect all 11 Familiar Orbs
Join the Brainiacs (if you attend Foxbury), Art Society (if you attend Britechester) and get to Rank 3
Get an Economics Degree (Distinguished available at Foxbury)
Get to Max Level (10) of the Administrative Education Career
Review 5 Budget Proposals
Join the Brainiacs (if you attend Foxbury), Art Society (if you attend Britechester) and get to Rank 3
Get an Psychology Degree (Distinguished available at Foxbury)
Write 5 Scholarly Papers
Write and publish at least 2 research papers (level 8 research and debate skill)
Get to Max Level (10) of the Professor (Education) Career
Get an Computer Science Degree (Distinguished available at Foxbury)
While at University, join the E-Sports Competitor after school activity and get to “Captain” rank
Craft Computer Glasses
Get to Max Level (10) of the Computer Engineer Career
Join the Bot Savants (if you go to Foxbury) and get to rank 3
Get an Physics Degree (Distinguished available at Foxbury)
Max the Robotics Skill
Craft all types of Bots – Cleaner, Gardening, Party, and Fixer
Craft and equip a Robo-Arm
Craft and equip a full Exomech Suit
Craft and activate a Servo
Get to Max Level (10) of the Mechanical Engineer Career
Join the Secret Society and get to rank 3 (either university)
Get a History Degree (Distinguished available at Britechester)
Make 5 Rulings
Get to Max Level (10) of the Judge (Law) Career
Join the Debate Guild (if you go to Britechester) and get to rank 3
Get a Language and Literature Degree (Distinguished available at Britechester)
Obtain 5 new clients
Max the Research and Debate Skill
Have 2 Professional Debates (at a podium)
Get to Max Level (10) of the Private Attorney (Law) Career
*Could be combined with Set 12 or 13 If you wanted
Go to University and get a degree in Biology (Distinguished available at Foxbury University)
While at school, join the Soccer Team Player after school activity and get to “Playmaker” rank
Join either Foxbury Spirit Squad or Britechester Spirit Corps and get to rank 3 (Depending on which school you go to)
Get an Athletic Career job after graduation and get to max level
Get to Max Level (10) in the Civic Planner (Civil Designer) Career
Rally Voters 10 times
Draft 15 Municipal Concepts
Have 4 active Neighborhood Action Plans in your neighborhood
Turn a Community Space into a Marketplace (will need a Community Space in your neighborhood to do this, it can be placed there even if you’re not in Evergreen Harbor)
Max the Logic Skill
Get to Max Level (10) in the Green Technician (Civil Designer) Career
Turn a Community Space into a Community Garden (will need a Community Space in your neighborhood to do this, it can be placed there even if you’re not in Evergreen Harbor)
Farm at least one type of insect at a bug hotel and use it for BioFuel
Set up an upgraded vertical garden with at least one “Cruelty-Free Meat Wall” somewhere on your lot.
Draft and Submit 10 Eco-Invention Concepts
Unlock the Smog Vacuum Fabrication recipe via submitting Eco-Invention Concepts
Produce enough power and water on your lot that you can sell or store the surplus
Own at least one toilet converted to a Compost Container
Max the Logic Skill
Turn a Community Space into a Maker Space (will need a Community Space in your neighborhood to do this, it can be placed there even if you’re not in Evergreen Harbor)
Get Bits and Pieces via Dumpster Diving
Max the Fabrication Skill (10)
Make all the different types of Emotional Aura Candles at the Candle Making Station and display somewhere on your lot
Unlock at least 5 secret fabrication recipes through social interactions
Max the Juice Fizzing Skill (5)
Send off at least one of all 8 different emotional juices for Fizz Enthusiast evaluation
Get the Mark of the Maker Plaque by maxing out the job performance meter as a Freelance Crafter
Max the Knitting skill (10)
Complete the Lord/Lady of the Knits Aspiration
Make the forbidden sweater
Make Yarny and display him
Sell 10 excellent or better knits on Plopsy
Create more than 5 legendary knits
Teach someone to knit until their skill is at level 5
Unlock all the wear-ables for your family wardrobe
Make a baby onesie for every baby in your household
Complete the following aspirations: Hope VS Order, Galactic Privateer, Enforcer of Order, and Paragon of Hope (not necessarily in that order)
Get max reputation with all three factions at one point in your sim’s life (not all three at the same time)
Learn all ten Batuu cooking recipes by trying them out
Learn all ten Batuu mixology recipes by trying them out
Complete the Lightsaber Part collection
Complete the Batuu Records collection
Beat all three faction quest leaders in Lightsaber duels or Sabacc Games
Max the Fitness skill
Make at least one of both types of droids and fully upgrade at least one of them.
Max Logic and Charisma skills
Max the Supervisor branch of the Salaryperson career
Hold at least 5 phone conferences
Work overtime more than 10 times
Get the Workaholic, People Person, and Indoorsy Lifestyles
Max the Logic and Programming skills
Max the Expert branch of the Salaryperson career
Optimize at least 5 Spreadsheet formulas
Exercise to decompress at least 10 times
Take at least 15 power naps
Get the Workaholic, Techie, and Indoorsy Lifestyles
Complete the Mt. Komorebi Sightseer aspiration
Complete the Extreme Sports Enthusiast aspiration
Max the Skiing or Snowboarding skill
Max the Rock Climbing Skill
Build something cool at the top of the mountain!
Complete the Simmi Collection
Get the Chopstick Savvy Trait
Collect all of the Forest Spirit dolls (not a collection item, but there are five of them)
Get the Energetic, Adrenaline Seeker, Frequent Traveler, and Outdoorsy Lifestyles
Set your home as a Haunted House
Max the Medium skill (level 5)
Meet Guidry and get your license from him
Join the Paranormal Investigator Career
Purchase the Brave Reward Trait
Collect all 6 of the Bizarre Idols and display somewhere in the house
Collect one of each color of Spectre (there are 3) and display somewhere in the house
Collect all 7 Dahlia Dolls and display somewhere in the house
Collect all 12 soul pieces and display somewhere in the house
Collect all 10 Unassuming Candy Jars
Summon Bonehilda while Temperance is present
Complete at least 20 Expert Paranormal Gigs
Complete the Fabulously Filthy Aspiration
Have one befriended dustbunny in each room of your house
Create a disaster of a home, and decorate it to match!
After you have completed the above, switch to the Perfectly Pristine aspiration and complete it
Transform your home into a pristine palace, and change the decor to match!
Get a job as a Freelance Interior Decorator
Max out your career (to level 10)
Complete at least 20 Room Renovations with happy customers
Complete at least 15 Room Additions with happy customers
Complete at least 10 Level Renovations with happy customers
Complete at least 5 Level Additions with happy customers
Set up your lot with the Simple Living and the Wild Foxes challenges for this generation (can be removed after the generation)
Complete the Country Caretaker Aspiration
Own at least two Cows
Collect and add all 9 milks to your notebook
Own at least two Llamas
Collect at least one of every type of wool from your Llamas (9 types)
Own 16 chickens (two coops full) at at least one point in your life
Have both a Wild bird and wild rabbit home on your lot
Try to collect all of the ribbons from Finchwick Fair (finishing this collection may be quite difficult, so I leave finishing it up to your discretion)
Have and turn into decor at least one perfect oversize crop from all 5 types (Lettuce, Pumpkin, Aubergine, Mushroom, and Watermelon)
Learn to make all types of animal treat (13)
Do at least 5 errands for every errand giver (The grocery store owner, the grocery deliverer, the mayor, both of the garden store owners, the pub owner, and the creature keeper. This totals out to at least 35 errands completed)
Complete all three Spa Day Refresh aspirations
Get to Level 10 in the Wellness skill
Try Out All Massage Table Massages
Try Out All Hand and Foot Massages
Try Out the Sauna
Try Out All Mud and Soak Baths
Get both a manicure and pedicure
Lead 10 yoga classes
Give 15 massages to other sims for money
Meditate for at least 24 hours total
Try out face masks from the mini fridges
Complete the Werewolf Initiate Aspiration
Complete the Emissary of the Collective Aspiration
(Pass on Alpha to another sim before completing the next item)
Complete the Wildfang Renegade Aspiration
(Pass on Alpha to another sim before completing the next item)
Complete the Lone Wolf Aspiration
Complete the Cure Seeker Aspiration
Complete the Moonwood Relic Collection
Collect all of the Werewolf-themed books available
Have a Sim earn all positive Character Value traits
Get to level three in all Part-Time Careers (not on the same sim – and can be done as an Adult)
Reach Level 10 in the Scout career (Seasons)
Complete the Drama Llama Aspiration (High School Years)
Complete the Goal Oriented Aspiration (High School Years)
Complete the Live Fast Aspiration (High School Years)
Complete the Admired Icon Aspiration (High School Years)
Have 2 Child Sims in a Single Household Complete All Child Aspirations
Have a Child Sim Collect All Voidcritters (Kid’s Room Stuff)
Have a Child Sim Collect All Limited Edition Voidcritters (Kid’s Room Stuff)
Have a Child Sim Collect All Voidcritters Without Buying Booster Packs or Using Previously Collected Cards (Kid’s Room Stuff)
Have a Child Sim Train a Voidcritter of Each Element to Level 10 (Kid’s Room Stuff)
Have a Child Sim Reach Level 10 in an Adult Skill
Have a toddler earn the Top Notch Toddler trait by maxing all skills
Updated through High School Years 1/8/23
This challenge is all about doing everything – and I mean EVERYTHING – in the game of Sims 4. It’s based off of the Absolute Master and the Achiever challenges, neither of which have been updated for the current expansions. The only thing I don’t require is finishing ALL achievements and collecting ALL pet Traits. I will list them in case you want to collect them, but they are completely optional to get. Some achievements are really buggy – in particular, the legacy ones, so I’m not including them. Also, this is NOT played on a “point system”, that would be way too complicated. The ultimate goal is to get it done in 26 generations… but it may be more depending on how you pace yourselves. (Update after Eco Lifestyle: With 80 goal sets if you have all expansions, I’ve been informed it IS still mathematically possible to get this challenge done in 26 generations, but it would be a VERY difficult challenge.)
(more…)Main Apartment Switch Rules | Switch Six Rules
Switch Five Part 2
We start by looking at Selina Nash’s starting stats:


She’s not exactly in a good mood. I guess first thing will be to find some people to talk to. But first, I give her a high paying job…


And off we go. I don’t take a whole lot in the way of pictures through this last segment of testing, I really just wanted to get it over with. In fact, I end up not even getting the heir to YA.. just proving that the other goals are possible. Waiting for YA was just too boring and I wanted to get back to other games.
Meet Shingo. Traits are good, so we woo him pretty much immediately.

We do have to wait a while before I have enough for a bed, kitchen, and bathroom so we can move him in. He picks up a painting career, and starts working on his skill so he can get me some masterpieces for the final penthouse’s value.

Time to move!


New apartment furnishings are a little on the sparse side, but it’ll do. For now.


I move in a third sim, Ayuun, who is also a painter.

And give him a bedroom.

Nice little family!

Time to move again.


As for affording things in the new place… not so much. As you can tell, I’m planning on moving in a fourth sim.

And that’s him.. sleeping. Nobuya, who is going to be an Astronaut… which is one of the higher paying careers, so it should help with funds quite a bit.

Everyone’s busy. Just the way I like it.

Selina (and me) get bored, so I get her an easel, too, and make some more money that way.

Nobuya making a friend.

The two painters getting their museum views done in the Brindleton museum. I hadn’t ever been there, so I decided that’s where I’d send them.

Dinner time.

Merry Winterfest! Must decorate the tree! (So I make them ALL do it.)

Decorating is moving right along. The grand meal for Christmas looks nice and festive.

… And presents. Strangely enough, Shingo’s present was completely empty. Both from the tree and from Father Winter. Poor guy.

Time to move. Barely made it before aging up.


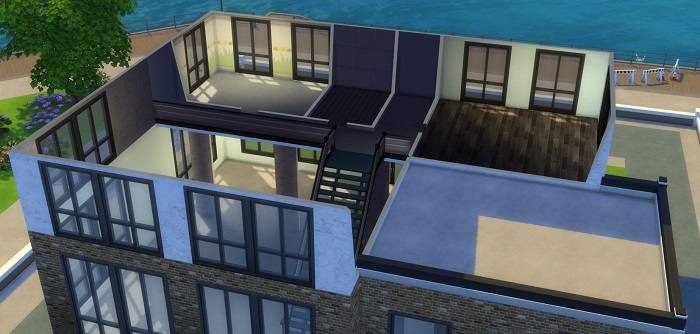
Man, this penthouse is HUGE. So I had to take multiple pictures of the scant furniture I put in.


There they all are.. ready to get to work making more money.

I put in all the masterpieces I’ve saved up… and this ended up being the value of the penthouse on move-in. The place looks silly with expensive artwork everywhere and nothing else but a couple offices and beds.

Time for the heir!

With all the money coming in, this doesn’t take long at all….

I add a third floor for the kids.

… And then I get a little obsessed with the toddler gym.


Rawr! Mommy monster!

I’m king of the world!! Oh yeah, this is the heir, Layne.


Even Shingo gets in on the jungle gym fun.

And this is where I finally get tired of playing this save. I proved that you can get target value without using the aging potions, too, which was pretty impressive. I could have added more to the house, and Selina was pregnant with their third kid, but I just couldn’t take fast forwarding anymore. So here’s the house…


… And the final value.

This officially concludes the testing phase for the Apartment Switch. YAY!!
Main Apartment Switch Rules | Switch Six Rules
Switch Five Part 2
Main Apartment Switch Rules | Switch Six Rules
Switch Five Part 2
We start by looking at Connor Ritchie’s starting stats:


And we made 916 simoleons from high school grades pushing us to rank 3 in his career. After sending him out collecting posters, he’s got enough to at least buy a computer station and a cooler for food. I waited on bed and bathroom since if he must he can sleep on benches and go pee in the public restroom. It’s not much.. but it’s home!

Then, the second day, we meet Deja cruising around outside the apartment and she was flirty.. and seemed to have decent traits.. so we made our move.

Deja’s spending the night.. and apparently the resident ghost had to come out to check her out.

In the morning, since I have a bed for her to sleep in, I pop the question with no idea how it’ll turn out.

Success!

Meet Deja Andrade. She wants to find her soulmate.. and I think she just did. 🙂

With proceeds from work and a lot of poster hunting, we even have a bathroom of sorts.

Soon after, it’s starting to look like a real apartment.

Aww.. Sorry Deja. 🙁

All the hard work paid off, though, because it’s time to move!

Didn’t take too long, but I already feel behind the curve.

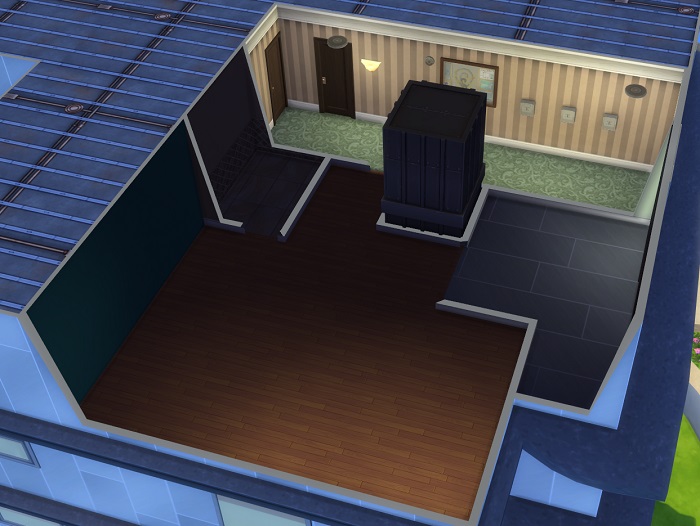
And apartment pics:

Here’s what they were able to afford in the second apartment:


Why is everyone getting sick when I need them to make money?! Cmon sims.. be nice to me. At least we have walls now.

And the start of an actual kitchen/breakfast nook.

Downstairs is done!

Proof that I’ve been going on the many dates required by the Soulmate aspiration. This is in the Experimental Kitchen restaurant that I built.

Time to move on!

Money’s coming faster.. but I still just don’t know if I’ll get this done in time… Never tried doing a Mansion Baron aspiration with only two money making sims before.

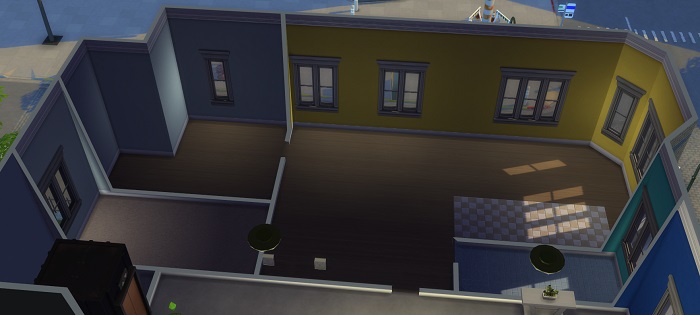
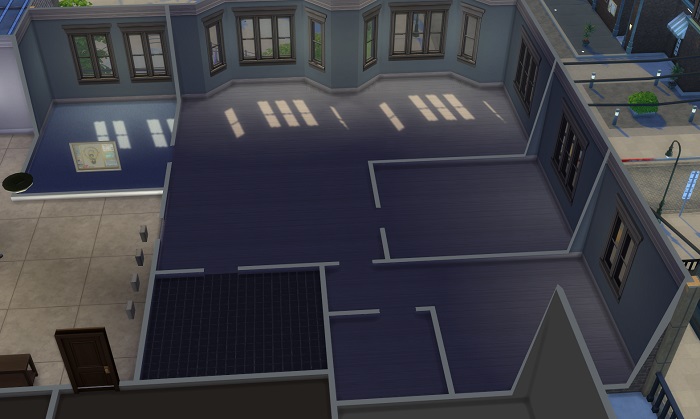
The upstairs…

And the downstairs.

Yikes! What on earth am I going to do with all this space?!?!

Deja is in the business career (painting career isn’t great money) but painting as a “hobby” in the hopes that we’ll get masterpiece paintings to raise the value of the next (and final) apartment. I start stockpiling any masterpieces in the household inventory to take with me. .. And then there’s poor Connor, constantly writing for more money.

Okay. almost all painted and portioned out.

This is to commemorate Deja getting her aspiration… soulmate. Now she can work on the Painter one.

.. And this is what I watch day in and day out. … fun, huh?

Time to move again!


Final shot of the apartment:

And here’s what we could afford in the penthouse after building the shell. i.e. not much.


Shortly after moving in, with money prospects still looking iffy, I chose to use the potion of youth on both Deja and Connor, to give me more time to get to 350k value.


Turns out I may not have needed it in the end, based on how much money I had left, but it was better safe than sorry.
Here’s a shot of the “finished” shell.. lots of furnishing left to do, though.

The heir is born!

Awww

To prove Connor got goal done. At this point, I was doing so much fast forwarding I didn’t take much in the way of pictures.

Time for a spare!

Our heir, Alexandra, sleeping peacefully for a change.

Isn’t she a cutie?

My try for just one more kid goes horribly awry. TWINS!

Alexandra as a teen.

Final Stats: We squeaked by on value, but got it all the same.


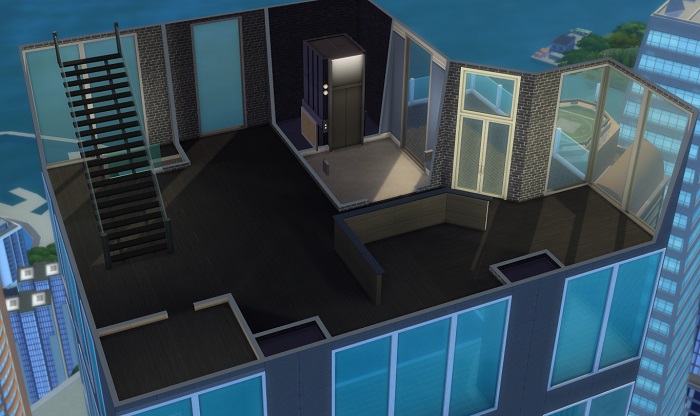
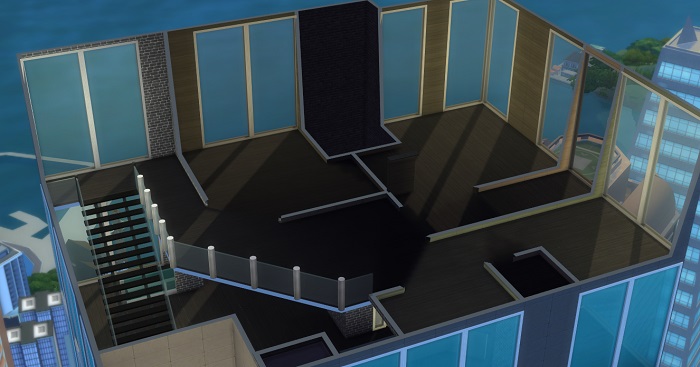
And a quick penthouse tour.


Now off to test Normal mode!
Main Apartment Switch Rules | Switch Six Rules
Switch Five Part 2
Go back to the Main Page | Go Back to Getting Started
Switch One | Switch Two | Switch Three | Switch Four | Switch Five | Switch Six
You now have an heir and you’re ready to move on to Switch Six Split the household, move your heir into, and reduce funds to 0 just like we did in the last Switch. (again, “testingcheats on”, “money 0”, then “testingcheats off”)
Okay, now your’re ready to play and have three goals:
One: (once again) get your apartment value up to within the target funds amount (That’s explained in a minute) and move to the next apartment until you get to the last apartment.
Two: Get to the Mansion Baron Aspiration in your last apartment (the penthouse) I leave which sim to do this on up to you. Even any heirs you have are fair game, unless you’re planning to use them for another challenge after this.
Three: Get your heir to Young adult stage. If you’re planning on doing another challenge after this, it’s recommended to have your heir unplayed, but I leave that up to you. Once you’ve got your Mansion baron done, your community lot built, and your heir aged up… you won!
I will warn you, this is a HARD challenge, no matter which difficulty you’re playing. As such, I will give you a few tips:
The apartments for this Switch are as follows:

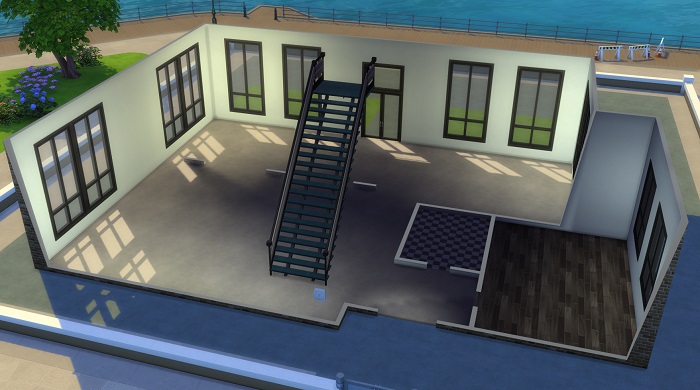
District: Spice Market
Lot Traits: Historical, Haunted
Rent per week: 600
Deposit: 1,000
Target Value: 8,000 - 10,000
This is designed for 1 bedroom, 1 bath, but at least it’s nicer than a lot of the other Switches’ first apartment. You likely won’t have any trouble with the “haunted” ghosts – I sure didn’t.. but even if they break some stuff, it’s better than a lot of the alternatives.


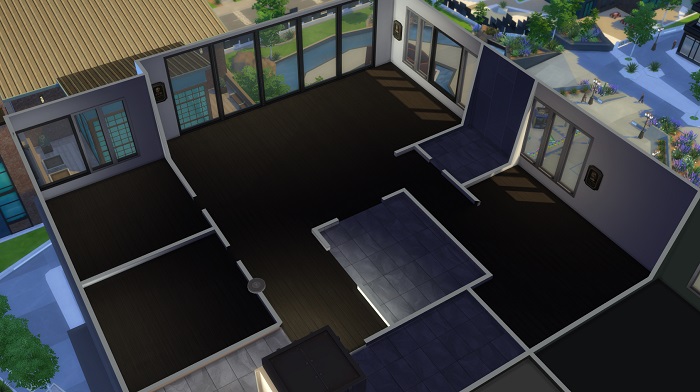
District: Fashion District
Lot Traits: Quake Zone, Party Place
Rent per week: 700
Deposit: 2,100
Minimum Move in Amount: 8,000 - 700 - 2,100 = about
5,200 to spend on furniture.
Target Value: 20,000 - 30,000
Designed for 2 bedrooms, 2 baths, this has plenty of room and a lovely balcony. For those on extreme, wall placement is kinda weird, but you’ll figure it out. Because the next apartment has a bit of a hefty initial price tag, you’ll probably spend longer here than you have on other second apartments.

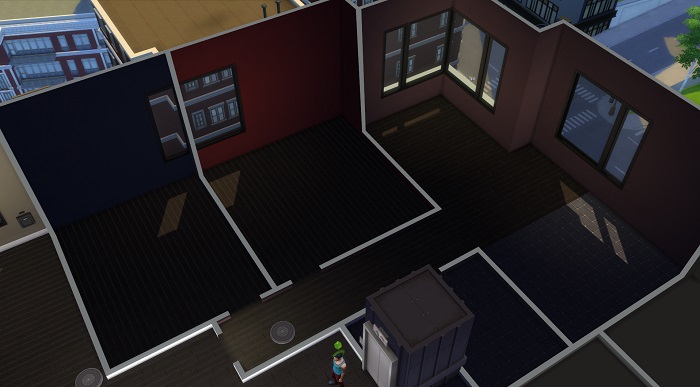
District: Uptown
Lot Trait: Chef's Kitchen
Rent per week: 3,500
Deposit: 15,500
Minimum Move in Amount: 20,000 - 3,500 - 15,500 = about
1,000 to spend on furniture.
Target Value: 60,000 - 100,000
Designed for 4 bedrooms, 3 baths, this apartment will probably require you to save more than the target from the last apartment to move into and still live fairly comfortably. However, you’ll find you have plenty of space to work with and a floor plan that’s at least tolerable. If you’re playing on extreme, you have SO much space that I found it difficult to even conceptualize what to do with it all.


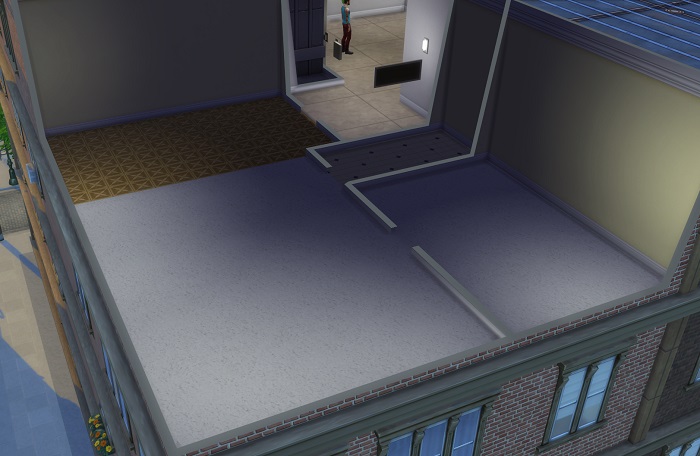
District: Fashion District
Lot Traits: Party Place, Sunny Aspect
Rent per week: 0 (you'll have normal bills instead)
Unfurnished Purchase Cost: 105,849
Bulldozed Purchase Cost: 31,669
Minimum Move in Amount: *See below
Target Value: 350,000
Designed for 3 bedrooms, 3 baths. This one’s going to cost you a pretty penny if you’re playing on normal difficulty and have to buy it unfurnished.. but then again, your goal is to have it be worth 350k, so 105k as a base price isn’t too bad. You’ll want to remember to save up enough to not only buy it, but save enough to also buy some stuff to furnish it as well. *On extreme, you can move in as soon as you’re finished with the previous apartment since the lot is bulldozed. However, on normal mode, remember you’ll need more than 105k value (value = your apartment worth + your household funds) to move in – and that won’t include furnishings.
Just like last time, if you’re doing the challenge on Extreme difficulty, as soon as you achieve Mansion Baron with your chosen sim, you’re free to go build your very own lounge. This also opens this lot for traveling to (so long as you have 1k or more in the bank). You’ll be building your lounge on this lot in San Myshuno:

Since there’s other lounges in other neighborhoods, you are also free to build whatever you like here.
You should be very proud of yourself, this is not an easy challenge. If you finished it on “Normal” maybe you might try going back and try it on “Extreme” and see if you can complete it that way. Every time you play this challenge, things will be just a bit different, so it’s fun to replay.
Go back to the Main Page | Go Back to Getting Started
Switch One | Switch Two | Switch Three | Switch Four | Switch Five | Switch Six
Go back to the Main Page | Go Back to Getting Started
Switch One | Switch Two | Switch Three | Switch Four | Switch Five | Switch Six
You now have an heir and you’re ready to move on to Switch Five Split the household, move your heir into 2A Jasmine Suites, and reduce funds to 0 just like we did in the last Switch. (again, “testingcheats on”, “money 0”, then “testingcheats off”)
Okay, now your’re ready to play and again have three goals:
One: (once again) get your apartment value up to within the target funds amount and move to the next apartment until you get to the last apartment.
Two: (also again) Have your heir ready to start the next Switch. (This was explained in Switch One, refer back there if you’ve forgotten.)
Three: Get to max level on one of your sims (other than the heir) in either branch of the Politician Career (Politician or Charity). I leave which sim and which branch up to you.
The apartments for this Switch are as follows:

District: Spice Market
Lot Traits: Good Schools, Romantic Aura
Rent per week: 400
Deposit: 800
Target Value: 8,000 - 10,000
Designed for 1 bedroom, 1 bath, this apartment brings back the horrors of past switches with the electric box that can go on the fritz, but at least the plumbing is sound. It’s a quick and easy starter, as well as being a great apartment to woo your sim’s romantic partner. There really isn’t a lot of room, however, so expect to probably move out before starting a family.

District: Arts Quarter
Lot Traits: Gnomes, Penny Pixies
Rent per week: 1,200
Deposit: 1,000
Minimum Move in Amount: 8,000 - 1,200 - 1,000 = about 5,800
to spend on furniture.
Target Value: 20,000 - 35,000
This apartment is designed for 3 bedroom, 1 bath, and is, quite frankly, huge. It gives you plenty of room to build if you’re playing on extreme, and lots to decorate on normal. Because of the size of this apartment, I give you a wide range of target value. If you’re at the low end of the value, you will probably want to save a little extra cash so you can buy furniture when you get to the next apartment.

District: Uptown
Lot Trait: Romantic Fireplace
Rent per week: 2,500
Deposit: 12,500
Minimum Move in Amount: 20,000 - 2,500 - 12,500 = About
5,000 to spend on furniture.
Target Value: 45,000 - 55,000
This is designed for 1 bedroom 2 baths, but the first thing you’ll notice is how much space you have. There’s way more room than a 1 bedroom calls for, and you’ll have fun figuring out what to do with all that space.

District: Arts Quarter
Lot Traits: Great Soil, Natural Light
Rent per week: 0 (you'll have normal bills instead)
Unfurnished Purchase Cost: 33,788
Bulldozed Purchase Cost: 13,987
Minimum Move in Amount: 45,000 - 33,788 (on normal) = about
10k to spend
Target Value: 90,000
Your second penthouse… but this one actually is a penthouse instead of a house. For Extreme difficulty players: it will need the elevator, mailbox, and trash chute. Designed for 1 bedroom, 1 bath – so it’s tiny, but don’t forget, normal difficulty players, you are welcome to move walls – or build more – in this penthouse. You are not restricted to this shell, and in fact, on normal mode, you will likely need to build some to hit your 90k value (unless you go with adding lots of paintings.. but then you have to try to fit your entire family into the tiny shell that’s built for you).
Just like last time, if you’re doing the challenge on Extreme difficulty, as soon as you hit 90k value with your penthouse, you’re free to go build your very own Gym. This also opens this lot for traveling to (so long as you have 1k or more in the bank). You’ll be building your gym on this lot in San Myshuno:

Since there’s other gyms in other neighborhoods, you are also free to build whatever you like here.
Once you have minimum in value on your apartment, AND you have gotten to level 10 in the Politician Career (Politician or Charity) on one of your sims, you only need to raise your heir to the Young Adult age. Once your heir has this birthday, pause immediately and save your game. You’ll want to have as much time for the next challenge as possible.
You did it! Now that you have your just-aged-up Young Adult heir, and you completed the above apartments, you are now ready to move to the next Switch. If you’ve forgotten how to move your heir out, just refer to the top of this page.
Go back to the Main Page | Go Back to Getting Started
Switch One | Switch Two | Switch Three | Switch Four | Switch Five | Switch Six
I found this challenge on Mod the Sims.. (here) and liked the look of it, so I started playing. I found it 1.. too easy.. and 2.. lacking in rules for the expansions. So I’m modifying it for my uses. I don’t plan to blog the story of my “colony” (town), but I may post some build pictures and stuff as I go. I’m almost done with the first generation currently and I have 3 families (14 total sims) living in my town. Anyway. Back on topic. I wanted to write down my variation of the rules.. mostly so I don’t lose them. So here they are. Anything I changed I put in italics.
THE SIMS 4 SETTLER CHALLENGE
Your sim has decided to be one of the brave heroes throughout history who travel to the loneliest places on Earth to find a new home. Your job is to survive and create a thriving colony in the middle of nowhere.
GOAL
To build and to populate your colony. The challenge is over when you’ve lifted all restrictions. (My goal: lift all restrictions, have at least one of each community lot, and fill all lots except for the city apartments).
SETTING UP
-Set lifespan to normal.
-Aging must be on.
-Create a couple in CAS (young adult or adult). They are your settlers. Pick their traits and aspirations randomly (you can use dice, random.org or this trait generator: https://www.platinumsimmers.com/trait-randomiser/). Choose which one of them you’re going to control. (I use http://createarandomsim.com)
-Bulldoze all lots in the world (exceptions: The Bluffs, Von Haunt Estate, Ancient Ruins, and The Secret Lab.) Your sims are settlers and there are no other people living in the colony yet. You may leave one starter house and buy that lot for your sims, or you can build a completely new house or download one from the gallery.
-Delete all households except for the one you made. More will be spawned randomly.
-Choose the starting era for your settlers and choose the furniture, clothes, decorations etc. accordingly. For example, if you want to start in the Wild West in the 19th century, don’t buy a television. (Besides, your colony won’t have electricity in the beginning in any case.)
-You must use all or almost all your money building and furnishing the house. You can also buy up to three books and one pack of seeds. The point is that you must not have any money when you start the game. If you run out of things to buy for some reason, use a money cheat to reduce your money to zero.
RULES
-You may only control one sim. That sim is called the heir. You will control several heirs during this challenge, but only one at a time.
-There may only ever be one heir at a time. You can freely choose who the next heir is and you can decide when to start playing the next heir, but once you’ve decided, you can’t change your mind and go back to playing the old heir. If you start playing the new heir while the old one is still alive, the old one is not considered an heir anymore.
-The new heir must be the previous heir’s child.
-If the heir has many children, all those children except the future heir must move out when they become young adults – I’m changing this to the heir moves out and “takes” 20k simoleons from the household treasury. (That’s not arbitrary, that’s the amount that a sim moves into a lot with, so you have to have that much in their parent’s bank account to “take with them”. Use a cheat to reduce the parent’s bank account by this much.) This makes it more of a challenge to earn money the next generation, and allows me to play with many different houses so I don’t get bored.
-The heir may marry and move their spouse in.
-You may not age sims up days before their actual birthday.
-Cheats, mods or hacks that give you an advantage over a person who doesn’t use them are not recommended.
-If you want to make this challenge easier, you can use one helper (the spouse / sibling / parent etc. of your heir). The helper may do simple tasks (such as repair an object, water plants, cook a meal, feed a baby), but you shouldn’t control the helper too much – only a couple of tasks a day. If you don’t use a helper, you may notice that the inactive sims in your family won’t do much (or any!) work autonomously, which does not feel very realistic in a hard-working colony. Not using this rule.. the challenge is easy enough as it is.
-Traits and aspirations are always randomized when a baby is born or a sim ages up. You can use any random trait generator (e.g. http://www.simslegacychallenge.com/…rait-generator/ or https://www.platinumsimmers.com/trait-randomiser/) or just roll dice. Exception: You may choose the traits and aspirations for the child if either of the child’s parents has any of the following traits: Family-Oriented, Patriarch, Mentor. (No changing aspirations until “higher education” restriction is lifted).
RESTRICTIONS AND HOW TO LIFT THEM
School
There is no school in your colony. You must prevent children from going to school.
Requirements for lifting this restriction:
-There must be at least twelve people living in your colony (your family included).
Medicine
Hospital births are not allowed and woohooing may always lead to a pregnancy (roll a six-sided die or use random.org first: 1 means you need to pick the interaction Try for baby instead, and if you roll 2-6 you can just pick Woohoo). You can always choose to Try for baby if you want to.
Requirements for lifting this restriction:
-There must be at least three different community lots in your colony
Electricity
There is no electricity yet. You may not use the computer, the TV, the radio etc. (You may use the fridge, however).
Requirements for lifting this restriction:
-There must be at least four different community lots in your colony AND one of the sims in your current family must have 6 skill points in Handiness — I’m eliminating this entire rule. People out in the boonies can have electricity fairly easy, whether by cabling to the local grid or using a generator.. I’m putting my guys in this modern era, and it just doesn’t make sense to restrict electricity.
Careers
You may not have a normal job as there aren’t any companies or infrastructure. Careers are therefore not allowed, but you may use other means to earn money (painting, collecting, gardening, fishing etc.)
Requirements for lifting this restriction:
-There must be at least five different community lots in your colony
-There must also be at least thirty people living in your colony (including your family)
Higher education
There are no possibilities for higher education in your colony. If you unlock this, you can always choose the traits for your sims when they age up or are born. With this lifted, you can also change aspirations.
Requirements for lifting this restriction:
-You need to lift the restriction School first
-To lift this restriction, one of the sims in your current family must have the trait Genius and be at least a young adult. — Changing this to the heir needing to have the genius trait rolled in randomly.. so this could be either fast or interminably slow.
Aliens
If you happen to marry in an alien… congrats. You’ve got alien DNA. If your male heir gets abducted (or the partner of your heir) the alien baby is still allowed to be an heir. If you don’t want aliens, feel free to discount this rule.
Requirements for lifting this restriction:
-You need to find an alien to marry or get abducted and have a little blue surprise.
Pets
There are no pets allowed in your town. Once a sim qualifies for being a vet, they can build a vet clinic and lift this restriction. Again, if you don’t want pets, just ignore this rule and reroll the Cat or Dog Lover traits on your heirs.
Requirements for lifting this restriction:
-To qualify to lift this requirement, your heir needs to randomly roll either Cat Lover or Dog Lover trait.
-This heir then works towards getting money and setting up a Vet Clinic (requirements for this below). Once the Vet Clinic is built and in service, pets are allowed in any and all families.
Vampires
You may not play a vampire or have your sim turned into one. If you don’t want to have vampires, that’s fine as well, just ignore this rule and reroll an aspiration if you get one of the Vampire ones.
Requirements for lifting this restriction:
-To lift this restriction, your heir must randomly roll one of the Vampire Aspirations. This heir will then live in Forgotten Hollow when he/she moves out. To become a vampire, you have a choice to 1, make a vampire to turn you, or find one in and amongst the homeless in your town. If you choose to make the vampire, treat him or her as a new “family” to move in.. as they move in you must build them a house (unless, of course, you plan to marry them into the family).
-If your vampire heir’s heir 1, does not roll a Vampire aspiration (which is extremely likely) and 2, is a vampire – you must cure them of vampirism BEFORE they move out. Doing this will require your heir to be at level 10 vampire lore and get 10 wolfsbane, 10 garlic, and 10 plasma fruit to make the potion.
–If you choose to make your partner a vampire, and your heirs are vampires, you may control them to 1, feed them, and 2, keep them out of the sunlight. Vampire sims aren’t the smartest and the AI will not take care of them on their own.
Strangerville
You may not move into StrangerVille or build any houses or lots there. until . Once you have a sim roll the StrangerVille aspiration, you can then work your way through the aspiration to open the town for others.
Requirements for lifting this restriction:
-To lift this restriction, you need to complete the StrangerVille aspiration and finish the “quest” (No spoilers from me here, but there will be a change in the town once you finish it) Once complete, this town will function just like any other and you’re welcome to build lots and move families in.
POPULATING THE COLONY
Yours is the only family living in the colony in the beginning.
Rules for adding families:
-When you are allowed to add a family, create them in CAS or download them from the Gallery. Roll a six-sided die or use random.org to determine the number of people in the family (between 1 and 6).
Different ways to populate the colony:
-Have babies! (For each heir’s family, I roll a random number between 2 and 4 to decide the number of kids they’ll have. This leaves room for event rolled children.. again, I’ll explain that later. This also allows for one non-heir to stay behind to live in the house. I then roll a die for the number of kids to find out which one will be the heir.)
-You can use your Charisma skill to persuade people to join your colony: You can add one family for every sim in your family who has reached level 6 in Charisma. (I’m changing this to being only the heir having the charisma skill, even if you did manage to get a spouse or kid with a 6 in charisma, they cannot bring in another family, only heirs can do this.)
-You can also attract people by hosting great parties. You may add one family for every type of party for which you’ve got a gold medal. You can only invite people who live in your colony to your parties, you can’t invite homeless people!
-Improving the services and the infrastructure in your colony will also make people move into your community. You may add one family for every community lot you add
–Event rolls.. more on this later..
ADDING RESIDENTIAL LOTS
I’m adding info on this, since it’s never specifically stated how and when you add new residential lots in the original rules.
When to add a lot:
-When you earn a population increase by either– 1, your heir’s charisma skill, 2, getting a gold on a party (once per party type, not individual party), or 3, adding a community lot– this family (you roll a 1-6 to figure out how many sims to make in this family) moves in and you build a house for them. Since they won’t be played by you, using money cheats to build their house is okay. Once they’re moved in, set them as unplayed in the manage households screen (in manage world) and this house is theirs. Should this family all die out, it’s free real estate for homeless townies to move into (unless you don’t like this idea, in which case you have 3 options: 1, when the family dies out, let the ghosts live there, 2, make a new family (with your 1-6 roll) to move in, or 3, use this lot for the next family set to move in.
-When your heir moves out with their 20k simoleons. Move them into a blank lot and use their 20k to build a starter home that they can add on to as they earn money.
-When you roll to add a four person family on an event roll.. more on this later..
ADDING COMMUNITY LOTS
There may only be one community lot of each type (ie. one café or restaurant, one pub or bar, one library etc.). One heir can unlock and add only one community lot during their lifetime, unless they have one or several of the following traits: Business Savvy, Genius, Ambitious. In that case, they may unlock and add one community lot per each of those traits that they have during their lifetime. (Edit… I can build more than one of each type, but still only one per heir’s lifetime. There’s just too many lots for them ALL to be residential, and I want to try to fill all of them except the city lots – haven’t decided what to do with those yet.)
When a community lot has a certain cost, you can either pay for that lot or try to fill the other requirements, in which case you won’t have to pay anything. If you decide to pay, just use a money cheat to reduce your money by the required amount. — (Nope. Too easy. The simoleon cost I’m raising from 5000 per lot to 20000… and I require BOTH the skill and the money requirement to build a lot.)
You don’t have to add all the community lots listed here in order to win this challenge. You can choose which ones to build. (?? Very confused by this, but eliminating it. No sense to skip any lots when I have all that space to build on!)
A church / a wedding venue / some other nice place for your colony to gather and meet each other (I made mine a Park – generic would also be a good choice.)
This should preferably be the first public building or venue that you create. There are many nice choices in the Gallery (under General), but you can also build it yourself. Just remember not to make it too modern!
Unlocking requirements:
-Cost: 20k simoleons AND your heir must have 6 skill points in Handiness
A café (or) restaurant or a bakery
Unlocking requirements:
-Cost: 20k simoleons AND OR your heir must have 6 skill points in Gourmet cooking
A pub or a bar
Unlocking requirements:
-Cost: 20k simoleons AND your heir must have 6 skill points in Mixology
A museum or an art gallery (or arts center)
Unlocking requirements:
-Cost: 20k simoleons AND your heir must have 6 skill points in Painting
A library
Unlocking requirements:
-Cost: 20k simoleons AND your heir must have 6 skill points in Writing
A concert hall or a lounge
Unlocking requirements:
-Cost: 20k simoleons AND your heir must have 6 skill points in Guitar, Violin or Piano (or Comedy)
A (National) park
Unlocking requirements:
-Cost: 20k simoleons AND your heir must have 6 skill points in Gardening
A nightclub (or karaoke bar)
Unlocking requirements:
-Cost: 20k simoleons AND your heir must have 8 friends outside the current family
A gym (or pool)
Unlocking requirements:
-Cost: 20k simoleons AND your heir must have 6 skill points in Athletics
A bakery or retail store
Unlocking requirements:
-Cost: The cost of the lot AND all building material and furnishings. This is likely to cost more than 20k, so I’m eliminating needing any skills to open one.
A Spa
Unlocking requirements:
-Cost: 20k simoleons AND your heir must have 6 skill points in Wellness skill
A Vet Clinic
Unlocking requirements:
-First, your heir MUST randomly roll either Cat Lover or Dog Lover trait as they’re growing up. Once you have an heir that qualifies, they can start building their Vet Clinic
-Cost: The cost of building the lot and furnishing it. This isn’t cheap, and you raise Vet Skill by actually doing it, therefore there is no skill requirement for this building.
If you want, you can roll a random event every Sunday to keep things interesting (use dice or random.org). (I did some moving around of options, and removed one completely. I didn’t feel the war on the borders killing the young adults was appropriate given the fact that I’m setting it in the modern era.) To make things even more interesting, you can roll both Sunday and Wednesdays like I am.
1 The spring festival makes people romantic. Add a new baby to a random female in your colony (Manage Worlds -> Household Management -> Edit sims in CAS).
2 A casanova moves into the community, sweeps one of the female sims in town (I changed this from having her be in your family. roll off the eligible females to decide which one it is.) off her feet and knocks her up. Pick the female sim randomly. That sim may even be your heir if your heir is female. Instructions: Create the casanova in CAS (if you haven’t already), move him into the female sim’s house and make him Try for baby with the selected sim. You can then move him out if you want to (if you move him out, make sure you build him a home or put him in one of the existing empty homes).
3 A flood destroys the house of one family in your colony (pick randomly) and you want to help them. Move them into your house. You may move them out after one week if you want. — I found this rule to be a nightmare in practice.. most of the time, I couldn’t get the family to move in because there’s not enough room in the household and I don’t play with mods… so I changed this to: Another Casanova (female, this time) moves in. Instructions same as above except the sim you make is a female and moved in with any eligible male in town. (which means even elders count, because she’s having the baby, not him).
4 A family asks if they may move into your colony. Create four sims in CAS and move them into your colony. (I took out the “you decide” .. why wouldn’t you want more sims?!)
5 Fire! One of your community buildings has burnt (pick randomly). You may rebuild it using your money if you want to, but it will cost 5000 simoleons. If you don’t want to rebuild it, bulldoze it.
6 One of your current heir’s children feels that they cannot bear the responsibility of building a colony. That child isn’t allowed to become an heir. Select the child randomly. (If your heir doesn’t have children, nothing happens.)
7 The autumn festival makes people romantic. Add a new baby to a random female in your colony (Manage Worlds -> Household Management -> Edit sims in CAS).
8 Your Mister Casanova is at it again! This time a female sim from another household gets pregnant. Pick the female sim randomly. Instructions: Create the casanova in CAS (if you haven’t already), move him into the female sim’s house and add a baby to that family in Household Management.
9 Problems with the building permit office. If you can raise your Logic skill by two points (unless it’s maxed already, in which case you succeed automatically) in the next 24 hours, you’ll be able to convince them that your requests are rational and nothing happens. If you can’t raise your Logic by two points, you may not build anything before next Sunday.
10 Another family asks if they may move into your colony. Create four sims in CAS and move them into your colony. (I took out the “you decide” .. why wouldn’t you want more sims?!)
11 Oil has been found in your colony. Use the cheat Motherlode or some other money cheat to add 50000 simoleons to your family funds.
12 One family decides they wants out and sells their home and moves away. This is figured out by a roll of all non-related families. (If you’ve married in sims from a family, that exempts them from this roll. Family in the area means they aren’t likely to leave the area.) Leave their home as-is and evict them, then delete them from your household list. Feel free to save them to your library in case you want to use them later for something else, or have them move back in on an appropriately numbered add family roll. (obviously, this means that families with more than 6 sims won’t be able to move back in).
I added three more events in the third generation:
13 Add baby to a MALE sim in a household. Just for something different.
14 Another family asks if they may move into your colony. Create four sims in CAS and move them into your colony. (I took out the “your decide” .. why wouldn’t you want more sims?!)
15 The second female Casanova to round out the total Same instructions as above.
16 Add baby to a MALE sim in a household.
Go back to the Main Page | Go Back to Getting Started
Switch One | Switch Two | Switch Three | Switch Four | Switch Five | Switch Six
You now have an heir and you’re ready to move on to Switch Four Split the household, move your heir into 17 Culpepper Street, and reduce funds to 0 just like we did in the last Switch. (again, “testingcheats on”, “money 0”, then “testingcheats off”)
Okay, now your’re ready to play and again have three goals:
One: (once again) get your apartment value up to within the target funds amount and move to the next apartment until you get to the last apartment.
Two: (also again) Have your heir ready to start the next Switch. (This was explained in Switch One, refer back there if you’ve forgotten.)
Three: Get to max level on one of your sims (other than the heir) in either branch of the Social Media Career (Internet Personality or Public Relations Representative). I leave which sim and which branch up to you. I will say, however, that one seems much easier than the other.
The major challenge here is making enough money to get to your first “penthouse” while working on the Social Media career. This will not be an easy task, but if you set yourself up to make money you should be able to do it just fine.
The apartments for this Switch are as follows:
District: Spice Market
Lot Trait: Gremlins
Rent per week: 400
Deposit: 800
Target Value: 8,000 - 10,000
Designed for 1 bedroom, 1 bath… and all I have to say is.. have fun with this one. That lot trait is almost as bad as the rats and wiring and plumbing problems in the early switches. Almost. Still, it’s got a decent amount of space for a single bedroom and should be pretty easy to decorate or build.
District: Arts Quarter
Lot Traits: Quiet, Haunted
Rent per week: 1,000
Deposit: 800
Minimum Move in Amount: 8,000 - 1,000 - 800 = You'll have about
6,200 to spend on furniture.
Target Value: 16,000 - 18,000
This apartment is designed for 2 bedroom 1 bathroom, and there’s plenty of space in those bedrooms. On extreme, you have lots of space for putting together a decent two bedroom apartment, and even to add a bathroom or a study. The ghosts shouldn’t bother you too bad, plus, your handiness should already be pretty good from the Gremlins in the last apartment!
District: Arts Quarter
Lot Trait: Historical
Rent per week: 1,400
Deposit: 5,600
Minimum Move in Amount: 16,000 - 1,400 - 5,600 = about
9,000 to spend on furnishings.
Target Value: 40,000 - 45,000
Designed for 3 bedroom, 2 bath – and this place is huge! Feel free to move walls around if a three bedroom apartment isn’t what you’re needing.. there’s one bathroom that’s taking up way too much room. Beyond that, this place is great. You’ll find that decorating (or building to suit) is easy when they give you this much room.
District: Spice Market
Lot Trait: Convivial
Rent per week: 0 (you'll have normal bills instead)
Unfurnished Purchase Cost: 50,320 (normal)
Bulldozed Purchase Cost: 9,000 (extreme)
Minimum Move in Amount: 40,000 - 50,320 = on normal mode
you're going to have to save up to move into this "apartment."
40,000 - 9,000 = on extreme mode you'll have about 41,000
to build and buy furniture on what is, essentially, a
plain old empty house lot, not an apartment at all.
Target Value: 80,000
This one is the your first “penthouse” – read: house lot – even basements are possible here. It doesn’t have to have an elevator and stuff, so you’re really free to build whatever you’d like here if you’re on Extreme (and even if you’re on Normal.) The unfurnished house is designed for 3 bedrooms, 2 baths. The move-in price is pretty steep if you’re on Normal, but then at least you won’t be faced with an empty lot to build on. This is definitely a lot you want to save up for before moving in.
Just like last time, if you’re doing the challenge on Extreme difficulty, as soon as you hit 80k value with your penthouse, you’re free to go build your very own … well… whatever you want. Since you already have a Karaoke bar in your city, feel free to make this lot whatever you want. Some ideas include either a Restaurant or a Spa, both of which have to be placed by you since there aren’t any in any of the sims neighborhoods. If you don’t own those packs, don’t despair, there’s plenty of lots types to choose from. This also opens this lot for traveling to (so long as you have 1k or more in the bank). You’ll be building your ..whatever you want… on the Planet Honey Pop lot in San Myshuno:

And for goodness sake, change that name! Hehe.
You did it! Now that you have your Young Adult heir, a level 10 social media icon, and you completed the above apartments, you are now ready to move to the next Switch. If you’ve forgotten how, refer to the top of the Switch Two page.
Go back to the Main Page | Go Back to Getting Started
Switch One | Switch Two | Switch Three | Switch Four | Switch Five | Switch Six
Go back to the Main Page | Go Back to Getting Started
Switch One | Switch Two | Switch Three | Switch Four | Switch Five | Switch Six
You now have an heir and you’re ready to move on to Switch Three. Split the household, move your heir into 1312 21 Chic Street, and reduce funds to 0 just like we did in the last Switch. (again, “testingcheats on”, “money 0”, then “testingcheats off”) If you don’t remember how to do this, check the Switch Two post for a tutorial.
Okay, now you’re ready to play and again have three goals:
One: (once again) get your apartment value up to within the target funds amount and move to the next apartment until you get to the last apartment.
Two: (also again) Have your heir ready to start the next Switch. (This was explained in Switch One, refer back there if you’ve forgotten.)
Three: Get to max level on one of your sims (other than the heir) in either branch of the Critic Career (Arts or Food). I leave which sim and which branch up to you. For an additional challenge, you’re welcome to attempt to get two sims to max level, one on each branch.
The notes from the the first switch still apply to this one. If you’ve forgotten, refer back to Switch One.
District: Fashion District
Lot Trait: Lively Neighbors
Rent per week: 400
Deposit: 600
Target Value: 8,000 - 10,000
Designed for 1 bedroom, 1 bath, this apartment is far better than the last two starting apartments. At least there’s no rats and roaches. Again, target value is pretty low to keep this in the “starter” category when you move out, so expect to be using pretty crappy furniture.
District: Spice Market
Lot Traits: Good Schools, On Ley Line
Rent per week: 1,000
Deposit: 1,500
Minimum Move in Amount: 8,000 - 1,000 - 1,500 = you'll
have about 6,500 to spend on furnishings
Target Value: 16,000 - 18,000
Designed for 2 bedroom, 1 bath, this apartment is the place for raising kids. Of course, you may find you move past this apartment pretty fast, before you even get to the “kid” stage yet. It does pose a little bit of an interesting puzzle when furnishing, however, due to it being a long and skinny apartment.
District: Spice Market
Lot Trait: Chef's Kitchen
Rent per week: 1,200
Deposit: 4,800
Minimum Move in Amount: 16,000 - 1,200 - 4,800 = about 10,000
to spend on furnishings
Target Value: 40,000 - 45,000
This apartment is EA-designed for 2 bedroom, 2 bath, but you may find the wall arrangement a bit weird. I sure did. Feel free to move walls when you get into this place, and for those on extreme, you’ll find there are a lot of ways you can partition the space out. If you planned ahead and had your kid(s) in the last apartment, there’s plenty of room for a second, and even a third bedroom in this apartment. Also, you’ll be spending more time in this third apartment than in the previous switches, because the next apartment is fairly costly and will require some saving before moving.
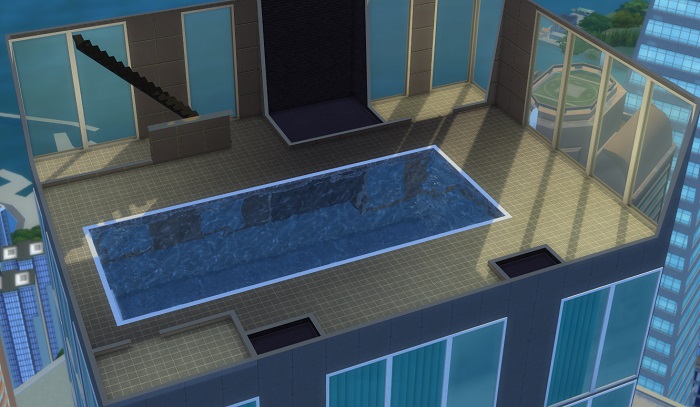
District: Uptown
Lot Traits: Great View
Rent per week: 7,500
Deposit: 37,500
Minimum Move in Amount: 40,000 - 7,500 - 37,500 = You'll
be short 5000 simoleons. However, remember the formula isn't
exact, you should probably have just about 0 if you move right
when you hit value on three, in other words, you're going to
want to save some up before moving.
Target Value: 70,000
Yup.. it’s got a pool. Designed for 2 bedroom, 3 bath. If you’re playing on extreme, you’re going to be creating floors as well as walls, and there’s no pool, but the place costs just as much. This will be a challenge, and you should save up for a while before moving in here, or you’ll be living on one floor like it’s a lawn. On normal, you’ve got a lot of decorating to do, and you may very well want to move walls around to make it work. Either way, getting this to value will be a challenge, but if you’ve set up your ability to make money enough to get here through the last three, you should be good.

Just like last time, if you’re doing the challenge on Extreme difficulty, as soon as you hit 70k value with your apartment, you’re free to go build your very own City Park. This also opens this lot for traveling to (so long as you have 1k or more in the bank). You’ll be building your park on this lot in San Myshuno:
This area has four frog spawners, fishing areas, and a little food court, so it will be nice to have it open finally. (I would have opened it up for you guys sooner, but the other two lots you’ve built were required by the next challenge.) I would suggest putting in at the very least a wedding arch and reception area for parties (if you’re the type to throw parties for your sims, that is.) Again, have fun with it!
You did it! Now that you have your Young Adult heir and you completed the above apartments, you are now ready to move to the next Switch. If you’ve forgotten how, refer to the top of the Switch Two page.
Go back to the Main Page | Go Back to Getting Started
Switch One | Switch Two | Switch Three | Switch Four | Switch Five | Switch Six
 November 2025 Dev DiarySuperSweetBot Commands for Mods & BroadcastersOctober 2025 Dev DiaryProgress Report!Hacking Situation ResolvedHey all…Not So Berry Updating
 Jaynie’s Gems: By-The-NumberToday