IllusoryThrall's Sims 4 Hub
- Challenges, Tips & Stories
Main Apartment Switch Rules | Switch Six Rules
Switch Five Part 2
We start by looking at Selina Nash’s starting stats:


She’s not exactly in a good mood. I guess first thing will be to find some people to talk to. But first, I give her a high paying job…


And off we go. I don’t take a whole lot in the way of pictures through this last segment of testing, I really just wanted to get it over with. In fact, I end up not even getting the heir to YA.. just proving that the other goals are possible. Waiting for YA was just too boring and I wanted to get back to other games.
Meet Shingo. Traits are good, so we woo him pretty much immediately.

We do have to wait a while before I have enough for a bed, kitchen, and bathroom so we can move him in. He picks up a painting career, and starts working on his skill so he can get me some masterpieces for the final penthouse’s value.

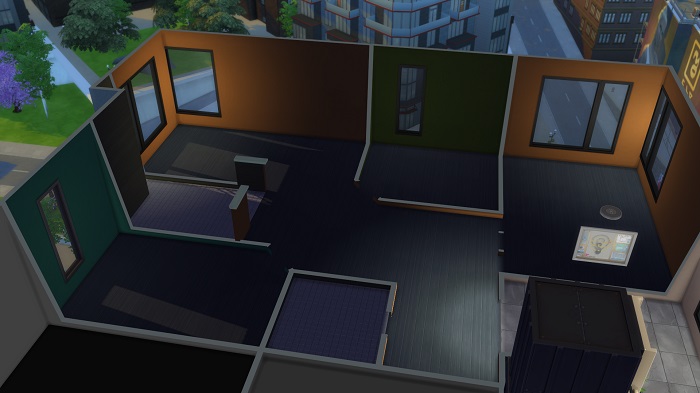
Time to move!


New apartment furnishings are a little on the sparse side, but it’ll do. For now.


I move in a third sim, Ayuun, who is also a painter.

And give him a bedroom.

Nice little family!

Time to move again.


As for affording things in the new place… not so much. As you can tell, I’m planning on moving in a fourth sim.

And that’s him.. sleeping. Nobuya, who is going to be an Astronaut… which is one of the higher paying careers, so it should help with funds quite a bit.

Everyone’s busy. Just the way I like it.

Selina (and me) get bored, so I get her an easel, too, and make some more money that way.

Nobuya making a friend.

The two painters getting their museum views done in the Brindleton museum. I hadn’t ever been there, so I decided that’s where I’d send them.

Dinner time.

Merry Winterfest! Must decorate the tree! (So I make them ALL do it.)

Decorating is moving right along. The grand meal for Christmas looks nice and festive.

… And presents. Strangely enough, Shingo’s present was completely empty. Both from the tree and from Father Winter. Poor guy.

Time to move. Barely made it before aging up.


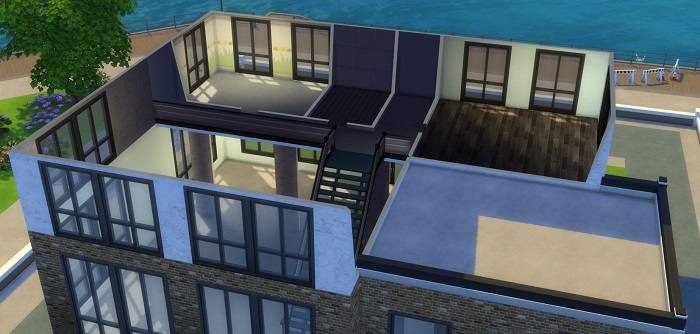
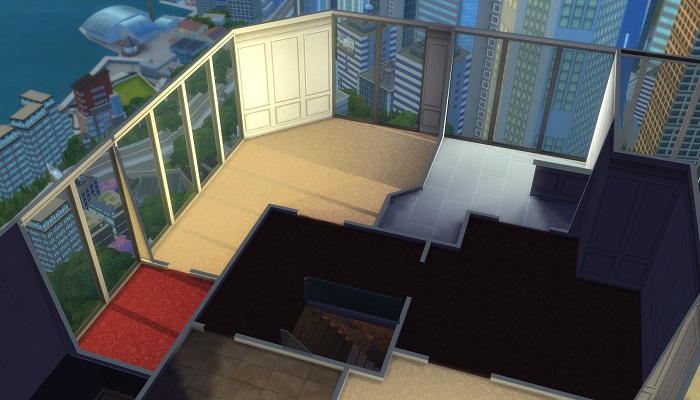
Man, this penthouse is HUGE. So I had to take multiple pictures of the scant furniture I put in.


There they all are.. ready to get to work making more money.

I put in all the masterpieces I’ve saved up… and this ended up being the value of the penthouse on move-in. The place looks silly with expensive artwork everywhere and nothing else but a couple offices and beds.

Time for the heir!

With all the money coming in, this doesn’t take long at all….

I add a third floor for the kids.

… And then I get a little obsessed with the toddler gym.


Rawr! Mommy monster!

I’m king of the world!! Oh yeah, this is the heir, Layne.


Even Shingo gets in on the jungle gym fun.

And this is where I finally get tired of playing this save. I proved that you can get target value without using the aging potions, too, which was pretty impressive. I could have added more to the house, and Selina was pregnant with their third kid, but I just couldn’t take fast forwarding anymore. So here’s the house…


… And the final value.

This officially concludes the testing phase for the Apartment Switch. YAY!!
Main Apartment Switch Rules | Switch Six Rules
Switch Five Part 2
Main Apartment Switch Rules | Switch Six Rules
Switch Five Part 2
We start by looking at Connor Ritchie’s starting stats:


And we made 916 simoleons from high school grades pushing us to rank 3 in his career. After sending him out collecting posters, he’s got enough to at least buy a computer station and a cooler for food. I waited on bed and bathroom since if he must he can sleep on benches and go pee in the public restroom. It’s not much.. but it’s home!

Then, the second day, we meet Deja cruising around outside the apartment and she was flirty.. and seemed to have decent traits.. so we made our move.

Deja’s spending the night.. and apparently the resident ghost had to come out to check her out.

In the morning, since I have a bed for her to sleep in, I pop the question with no idea how it’ll turn out.

Success!

Meet Deja Andrade. She wants to find her soulmate.. and I think she just did. 🙂

With proceeds from work and a lot of poster hunting, we even have a bathroom of sorts.

Soon after, it’s starting to look like a real apartment.

Aww.. Sorry Deja. 🙁

All the hard work paid off, though, because it’s time to move!

Didn’t take too long, but I already feel behind the curve.

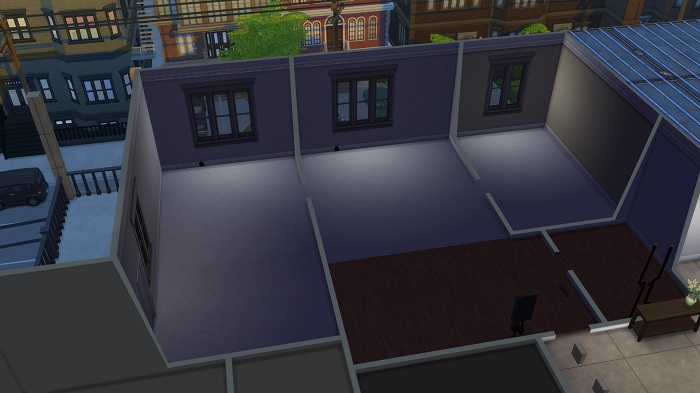
And apartment pics:

Here’s what they were able to afford in the second apartment:


Why is everyone getting sick when I need them to make money?! Cmon sims.. be nice to me. At least we have walls now.

And the start of an actual kitchen/breakfast nook.

Downstairs is done!

Proof that I’ve been going on the many dates required by the Soulmate aspiration. This is in the Experimental Kitchen restaurant that I built.

Time to move on!

Money’s coming faster.. but I still just don’t know if I’ll get this done in time… Never tried doing a Mansion Baron aspiration with only two money making sims before.

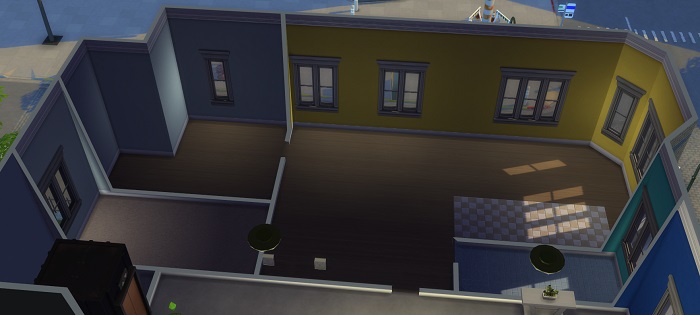
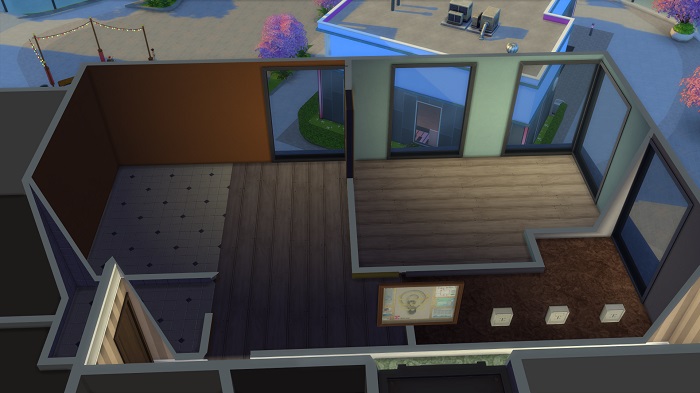
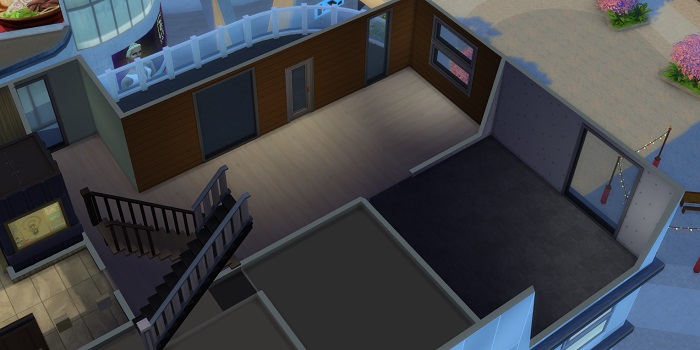
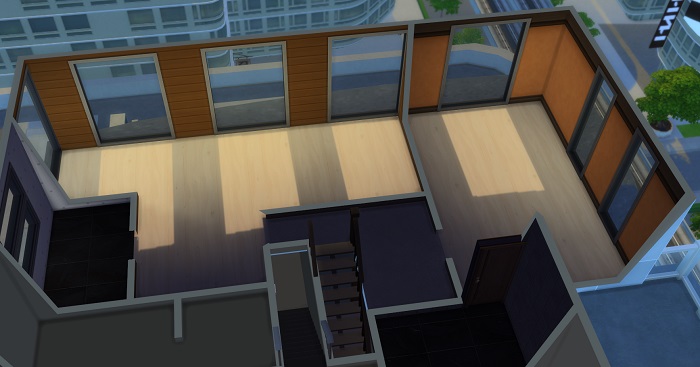
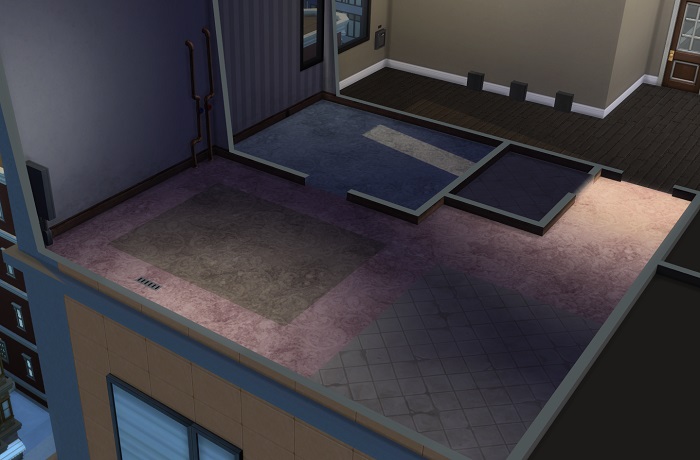
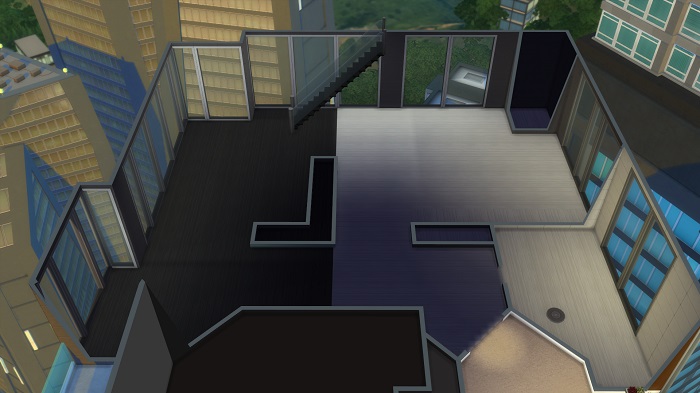
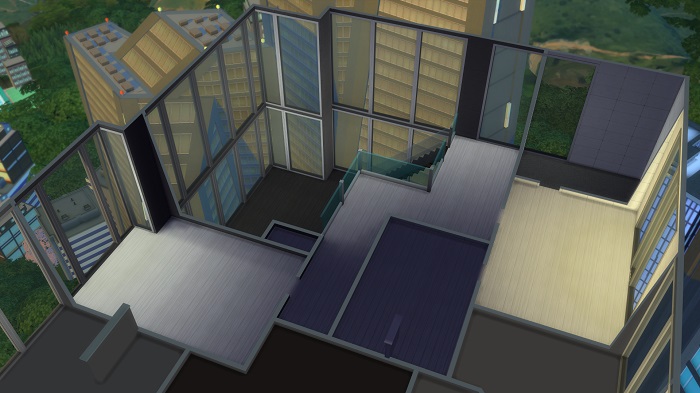
The upstairs…

And the downstairs.

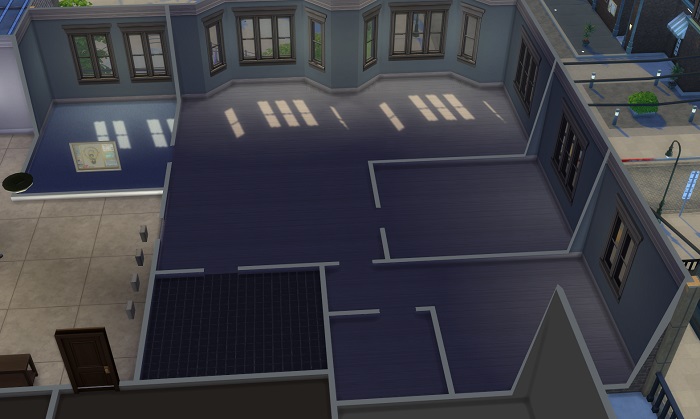
Yikes! What on earth am I going to do with all this space?!?!

Deja is in the business career (painting career isn’t great money) but painting as a “hobby” in the hopes that we’ll get masterpiece paintings to raise the value of the next (and final) apartment. I start stockpiling any masterpieces in the household inventory to take with me. .. And then there’s poor Connor, constantly writing for more money.

Okay. almost all painted and portioned out.

This is to commemorate Deja getting her aspiration… soulmate. Now she can work on the Painter one.

.. And this is what I watch day in and day out. … fun, huh?

Time to move again!


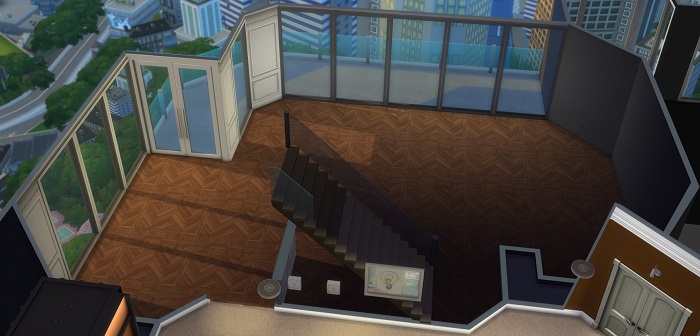
Final shot of the apartment:

And here’s what we could afford in the penthouse after building the shell. i.e. not much.


Shortly after moving in, with money prospects still looking iffy, I chose to use the potion of youth on both Deja and Connor, to give me more time to get to 350k value.


Turns out I may not have needed it in the end, based on how much money I had left, but it was better safe than sorry.
Here’s a shot of the “finished” shell.. lots of furnishing left to do, though.

The heir is born!

Awww

To prove Connor got goal done. At this point, I was doing so much fast forwarding I didn’t take much in the way of pictures.

Time for a spare!

Our heir, Alexandra, sleeping peacefully for a change.

Isn’t she a cutie?

My try for just one more kid goes horribly awry. TWINS!

Alexandra as a teen.

Final Stats: We squeaked by on value, but got it all the same.


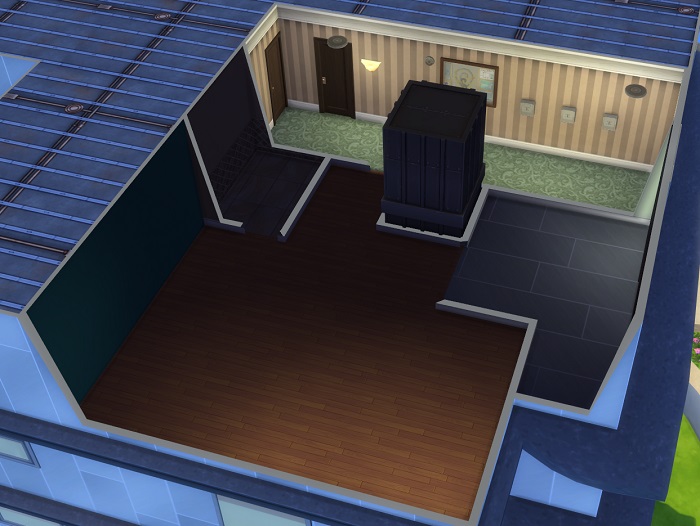
And a quick penthouse tour.


Now off to test Normal mode!
Main Apartment Switch Rules | Switch Six Rules
Switch Five Part 2
Go back to the Main Page | Go Back to Getting Started
Switch One | Switch Two | Switch Three | Switch Four | Switch Five | Switch Six
You now have an heir and you’re ready to move on to Switch Six Split the household, move your heir into, and reduce funds to 0 just like we did in the last Switch. (again, “testingcheats on”, “money 0”, then “testingcheats off”)
Okay, now your’re ready to play and have three goals:
One: (once again) get your apartment value up to within the target funds amount (That’s explained in a minute) and move to the next apartment until you get to the last apartment.
Two: Get to the Mansion Baron Aspiration in your last apartment (the penthouse) I leave which sim to do this on up to you. Even any heirs you have are fair game, unless you’re planning to use them for another challenge after this.
Three: Get your heir to Young adult stage. If you’re planning on doing another challenge after this, it’s recommended to have your heir unplayed, but I leave that up to you. Once you’ve got your Mansion baron done, your community lot built, and your heir aged up… you won!
I will warn you, this is a HARD challenge, no matter which difficulty you’re playing. As such, I will give you a few tips:
The apartments for this Switch are as follows:

District: Spice Market
Lot Traits: Historical, Haunted
Rent per week: 600
Deposit: 1,000
Target Value: 8,000 - 10,000
This is designed for 1 bedroom, 1 bath, but at least it’s nicer than a lot of the other Switches’ first apartment. You likely won’t have any trouble with the “haunted” ghosts – I sure didn’t.. but even if they break some stuff, it’s better than a lot of the alternatives.


District: Fashion District
Lot Traits: Quake Zone, Party Place
Rent per week: 700
Deposit: 2,100
Minimum Move in Amount: 8,000 - 700 - 2,100 = about
5,200 to spend on furniture.
Target Value: 20,000 - 30,000
Designed for 2 bedrooms, 2 baths, this has plenty of room and a lovely balcony. For those on extreme, wall placement is kinda weird, but you’ll figure it out. Because the next apartment has a bit of a hefty initial price tag, you’ll probably spend longer here than you have on other second apartments.

District: Uptown
Lot Trait: Chef's Kitchen
Rent per week: 3,500
Deposit: 15,500
Minimum Move in Amount: 20,000 - 3,500 - 15,500 = about
1,000 to spend on furniture.
Target Value: 60,000 - 100,000
Designed for 4 bedrooms, 3 baths, this apartment will probably require you to save more than the target from the last apartment to move into and still live fairly comfortably. However, you’ll find you have plenty of space to work with and a floor plan that’s at least tolerable. If you’re playing on extreme, you have SO much space that I found it difficult to even conceptualize what to do with it all.


District: Fashion District
Lot Traits: Party Place, Sunny Aspect
Rent per week: 0 (you'll have normal bills instead)
Unfurnished Purchase Cost: 105,849
Bulldozed Purchase Cost: 31,669
Minimum Move in Amount: *See below
Target Value: 350,000
Designed for 3 bedrooms, 3 baths. This one’s going to cost you a pretty penny if you’re playing on normal difficulty and have to buy it unfurnished.. but then again, your goal is to have it be worth 350k, so 105k as a base price isn’t too bad. You’ll want to remember to save up enough to not only buy it, but save enough to also buy some stuff to furnish it as well. *On extreme, you can move in as soon as you’re finished with the previous apartment since the lot is bulldozed. However, on normal mode, remember you’ll need more than 105k value (value = your apartment worth + your household funds) to move in – and that won’t include furnishings.
Just like last time, if you’re doing the challenge on Extreme difficulty, as soon as you achieve Mansion Baron with your chosen sim, you’re free to go build your very own lounge. This also opens this lot for traveling to (so long as you have 1k or more in the bank). You’ll be building your lounge on this lot in San Myshuno:

Since there’s other lounges in other neighborhoods, you are also free to build whatever you like here.
You should be very proud of yourself, this is not an easy challenge. If you finished it on “Normal” maybe you might try going back and try it on “Extreme” and see if you can complete it that way. Every time you play this challenge, things will be just a bit different, so it’s fun to replay.
Go back to the Main Page | Go Back to Getting Started
Switch One | Switch Two | Switch Three | Switch Four | Switch Five | Switch Six
Go back to the Main Page | Go Back to Getting Started
Switch One | Switch Two | Switch Three | Switch Four | Switch Five | Switch Six
You now have an heir and you’re ready to move on to Switch Five Split the household, move your heir into 2A Jasmine Suites, and reduce funds to 0 just like we did in the last Switch. (again, “testingcheats on”, “money 0”, then “testingcheats off”)
Okay, now your’re ready to play and again have three goals:
One: (once again) get your apartment value up to within the target funds amount and move to the next apartment until you get to the last apartment.
Two: (also again) Have your heir ready to start the next Switch. (This was explained in Switch One, refer back there if you’ve forgotten.)
Three: Get to max level on one of your sims (other than the heir) in either branch of the Politician Career (Politician or Charity). I leave which sim and which branch up to you.
The apartments for this Switch are as follows:

District: Spice Market
Lot Traits: Good Schools, Romantic Aura
Rent per week: 400
Deposit: 800
Target Value: 8,000 - 10,000
Designed for 1 bedroom, 1 bath, this apartment brings back the horrors of past switches with the electric box that can go on the fritz, but at least the plumbing is sound. It’s a quick and easy starter, as well as being a great apartment to woo your sim’s romantic partner. There really isn’t a lot of room, however, so expect to probably move out before starting a family.

District: Arts Quarter
Lot Traits: Gnomes, Penny Pixies
Rent per week: 1,200
Deposit: 1,000
Minimum Move in Amount: 8,000 - 1,200 - 1,000 = about 5,800
to spend on furniture.
Target Value: 20,000 - 35,000
This apartment is designed for 3 bedroom, 1 bath, and is, quite frankly, huge. It gives you plenty of room to build if you’re playing on extreme, and lots to decorate on normal. Because of the size of this apartment, I give you a wide range of target value. If you’re at the low end of the value, you will probably want to save a little extra cash so you can buy furniture when you get to the next apartment.

District: Uptown
Lot Trait: Romantic Fireplace
Rent per week: 2,500
Deposit: 12,500
Minimum Move in Amount: 20,000 - 2,500 - 12,500 = About
5,000 to spend on furniture.
Target Value: 45,000 - 55,000
This is designed for 1 bedroom 2 baths, but the first thing you’ll notice is how much space you have. There’s way more room than a 1 bedroom calls for, and you’ll have fun figuring out what to do with all that space.

District: Arts Quarter
Lot Traits: Great Soil, Natural Light
Rent per week: 0 (you'll have normal bills instead)
Unfurnished Purchase Cost: 33,788
Bulldozed Purchase Cost: 13,987
Minimum Move in Amount: 45,000 - 33,788 (on normal) = about
10k to spend
Target Value: 90,000
Your second penthouse… but this one actually is a penthouse instead of a house. For Extreme difficulty players: it will need the elevator, mailbox, and trash chute. Designed for 1 bedroom, 1 bath – so it’s tiny, but don’t forget, normal difficulty players, you are welcome to move walls – or build more – in this penthouse. You are not restricted to this shell, and in fact, on normal mode, you will likely need to build some to hit your 90k value (unless you go with adding lots of paintings.. but then you have to try to fit your entire family into the tiny shell that’s built for you).
Just like last time, if you’re doing the challenge on Extreme difficulty, as soon as you hit 90k value with your penthouse, you’re free to go build your very own Gym. This also opens this lot for traveling to (so long as you have 1k or more in the bank). You’ll be building your gym on this lot in San Myshuno:

Since there’s other gyms in other neighborhoods, you are also free to build whatever you like here.
Once you have minimum in value on your apartment, AND you have gotten to level 10 in the Politician Career (Politician or Charity) on one of your sims, you only need to raise your heir to the Young Adult age. Once your heir has this birthday, pause immediately and save your game. You’ll want to have as much time for the next challenge as possible.
You did it! Now that you have your just-aged-up Young Adult heir, and you completed the above apartments, you are now ready to move to the next Switch. If you’ve forgotten how to move your heir out, just refer to the top of this page.
Go back to the Main Page | Go Back to Getting Started
Switch One | Switch Two | Switch Three | Switch Four | Switch Five | Switch Six
Go back to the Main Page | Go Back to Getting Started
Switch One | Switch Two | Switch Three | Switch Four | Switch Five | Switch Six
You now have an heir and you’re ready to move on to Switch Four Split the household, move your heir into 17 Culpepper Street, and reduce funds to 0 just like we did in the last Switch. (again, “testingcheats on”, “money 0”, then “testingcheats off”)
Okay, now your’re ready to play and again have three goals:
One: (once again) get your apartment value up to within the target funds amount and move to the next apartment until you get to the last apartment.
Two: (also again) Have your heir ready to start the next Switch. (This was explained in Switch One, refer back there if you’ve forgotten.)
Three: Get to max level on one of your sims (other than the heir) in either branch of the Social Media Career (Internet Personality or Public Relations Representative). I leave which sim and which branch up to you. I will say, however, that one seems much easier than the other.
The major challenge here is making enough money to get to your first “penthouse” while working on the Social Media career. This will not be an easy task, but if you set yourself up to make money you should be able to do it just fine.
The apartments for this Switch are as follows:
District: Spice Market
Lot Trait: Gremlins
Rent per week: 400
Deposit: 800
Target Value: 8,000 - 10,000
Designed for 1 bedroom, 1 bath… and all I have to say is.. have fun with this one. That lot trait is almost as bad as the rats and wiring and plumbing problems in the early switches. Almost. Still, it’s got a decent amount of space for a single bedroom and should be pretty easy to decorate or build.
District: Arts Quarter
Lot Traits: Quiet, Haunted
Rent per week: 1,000
Deposit: 800
Minimum Move in Amount: 8,000 - 1,000 - 800 = You'll have about
6,200 to spend on furniture.
Target Value: 16,000 - 18,000
This apartment is designed for 2 bedroom 1 bathroom, and there’s plenty of space in those bedrooms. On extreme, you have lots of space for putting together a decent two bedroom apartment, and even to add a bathroom or a study. The ghosts shouldn’t bother you too bad, plus, your handiness should already be pretty good from the Gremlins in the last apartment!
District: Arts Quarter
Lot Trait: Historical
Rent per week: 1,400
Deposit: 5,600
Minimum Move in Amount: 16,000 - 1,400 - 5,600 = about
9,000 to spend on furnishings.
Target Value: 40,000 - 45,000
Designed for 3 bedroom, 2 bath – and this place is huge! Feel free to move walls around if a three bedroom apartment isn’t what you’re needing.. there’s one bathroom that’s taking up way too much room. Beyond that, this place is great. You’ll find that decorating (or building to suit) is easy when they give you this much room.
District: Spice Market
Lot Trait: Convivial
Rent per week: 0 (you'll have normal bills instead)
Unfurnished Purchase Cost: 50,320 (normal)
Bulldozed Purchase Cost: 9,000 (extreme)
Minimum Move in Amount: 40,000 - 50,320 = on normal mode
you're going to have to save up to move into this "apartment."
40,000 - 9,000 = on extreme mode you'll have about 41,000
to build and buy furniture on what is, essentially, a
plain old empty house lot, not an apartment at all.
Target Value: 80,000
This one is the your first “penthouse” – read: house lot – even basements are possible here. It doesn’t have to have an elevator and stuff, so you’re really free to build whatever you’d like here if you’re on Extreme (and even if you’re on Normal.) The unfurnished house is designed for 3 bedrooms, 2 baths. The move-in price is pretty steep if you’re on Normal, but then at least you won’t be faced with an empty lot to build on. This is definitely a lot you want to save up for before moving in.
Just like last time, if you’re doing the challenge on Extreme difficulty, as soon as you hit 80k value with your penthouse, you’re free to go build your very own … well… whatever you want. Since you already have a Karaoke bar in your city, feel free to make this lot whatever you want. Some ideas include either a Restaurant or a Spa, both of which have to be placed by you since there aren’t any in any of the sims neighborhoods. If you don’t own those packs, don’t despair, there’s plenty of lots types to choose from. This also opens this lot for traveling to (so long as you have 1k or more in the bank). You’ll be building your ..whatever you want… on the Planet Honey Pop lot in San Myshuno:

And for goodness sake, change that name! Hehe.
You did it! Now that you have your Young Adult heir, a level 10 social media icon, and you completed the above apartments, you are now ready to move to the next Switch. If you’ve forgotten how, refer to the top of the Switch Two page.
Go back to the Main Page | Go Back to Getting Started
Switch One | Switch Two | Switch Three | Switch Four | Switch Five | Switch Six
Go back to the Main Page | Go Back to Getting Started
Switch One | Switch Two | Switch Three | Switch Four | Switch Five | Switch Six
You now have an heir and you’re ready to move on to Switch Three. Split the household, move your heir into 1312 21 Chic Street, and reduce funds to 0 just like we did in the last Switch. (again, “testingcheats on”, “money 0”, then “testingcheats off”) If you don’t remember how to do this, check the Switch Two post for a tutorial.
Okay, now you’re ready to play and again have three goals:
One: (once again) get your apartment value up to within the target funds amount and move to the next apartment until you get to the last apartment.
Two: (also again) Have your heir ready to start the next Switch. (This was explained in Switch One, refer back there if you’ve forgotten.)
Three: Get to max level on one of your sims (other than the heir) in either branch of the Critic Career (Arts or Food). I leave which sim and which branch up to you. For an additional challenge, you’re welcome to attempt to get two sims to max level, one on each branch.
The notes from the the first switch still apply to this one. If you’ve forgotten, refer back to Switch One.
District: Fashion District
Lot Trait: Lively Neighbors
Rent per week: 400
Deposit: 600
Target Value: 8,000 - 10,000
Designed for 1 bedroom, 1 bath, this apartment is far better than the last two starting apartments. At least there’s no rats and roaches. Again, target value is pretty low to keep this in the “starter” category when you move out, so expect to be using pretty crappy furniture.
District: Spice Market
Lot Traits: Good Schools, On Ley Line
Rent per week: 1,000
Deposit: 1,500
Minimum Move in Amount: 8,000 - 1,000 - 1,500 = you'll
have about 6,500 to spend on furnishings
Target Value: 16,000 - 18,000
Designed for 2 bedroom, 1 bath, this apartment is the place for raising kids. Of course, you may find you move past this apartment pretty fast, before you even get to the “kid” stage yet. It does pose a little bit of an interesting puzzle when furnishing, however, due to it being a long and skinny apartment.
District: Spice Market
Lot Trait: Chef's Kitchen
Rent per week: 1,200
Deposit: 4,800
Minimum Move in Amount: 16,000 - 1,200 - 4,800 = about 10,000
to spend on furnishings
Target Value: 40,000 - 45,000
This apartment is EA-designed for 2 bedroom, 2 bath, but you may find the wall arrangement a bit weird. I sure did. Feel free to move walls when you get into this place, and for those on extreme, you’ll find there are a lot of ways you can partition the space out. If you planned ahead and had your kid(s) in the last apartment, there’s plenty of room for a second, and even a third bedroom in this apartment. Also, you’ll be spending more time in this third apartment than in the previous switches, because the next apartment is fairly costly and will require some saving before moving.
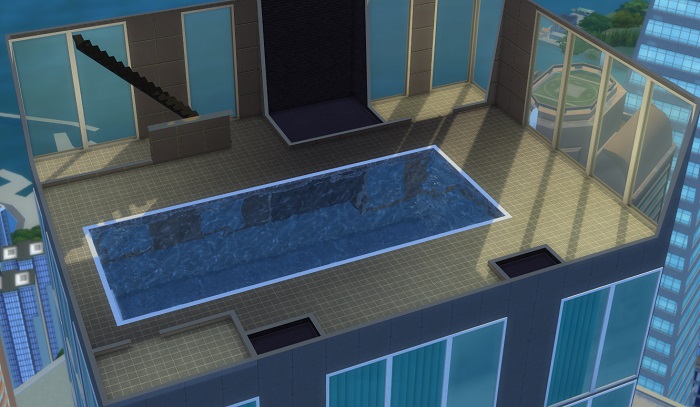
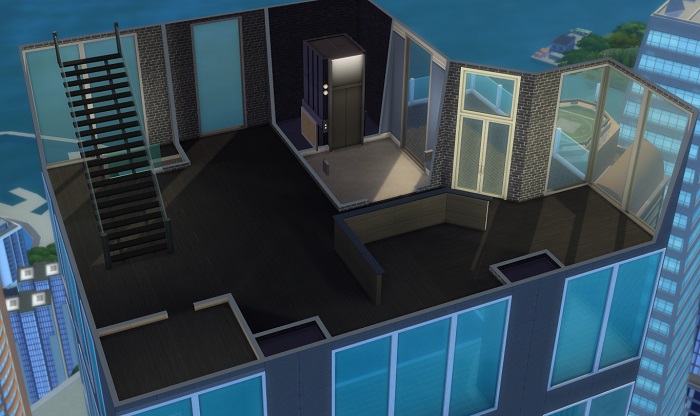
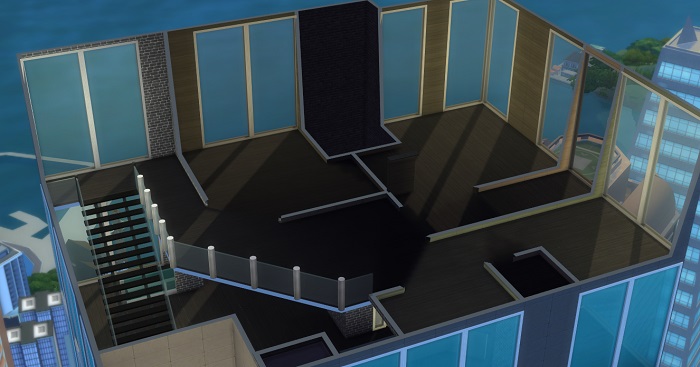
District: Uptown
Lot Traits: Great View
Rent per week: 7,500
Deposit: 37,500
Minimum Move in Amount: 40,000 - 7,500 - 37,500 = You'll
be short 5000 simoleons. However, remember the formula isn't
exact, you should probably have just about 0 if you move right
when you hit value on three, in other words, you're going to
want to save some up before moving.
Target Value: 70,000
Yup.. it’s got a pool. Designed for 2 bedroom, 3 bath. If you’re playing on extreme, you’re going to be creating floors as well as walls, and there’s no pool, but the place costs just as much. This will be a challenge, and you should save up for a while before moving in here, or you’ll be living on one floor like it’s a lawn. On normal, you’ve got a lot of decorating to do, and you may very well want to move walls around to make it work. Either way, getting this to value will be a challenge, but if you’ve set up your ability to make money enough to get here through the last three, you should be good.

Just like last time, if you’re doing the challenge on Extreme difficulty, as soon as you hit 70k value with your apartment, you’re free to go build your very own City Park. This also opens this lot for traveling to (so long as you have 1k or more in the bank). You’ll be building your park on this lot in San Myshuno:
This area has four frog spawners, fishing areas, and a little food court, so it will be nice to have it open finally. (I would have opened it up for you guys sooner, but the other two lots you’ve built were required by the next challenge.) I would suggest putting in at the very least a wedding arch and reception area for parties (if you’re the type to throw parties for your sims, that is.) Again, have fun with it!
You did it! Now that you have your Young Adult heir and you completed the above apartments, you are now ready to move to the next Switch. If you’ve forgotten how, refer to the top of the Switch Two page.
Go back to the Main Page | Go Back to Getting Started
Switch One | Switch Two | Switch Three | Switch Four | Switch Five | Switch Six
Go back to the Main Page | Go Back to Getting Started
Switch One | Switch Two | Switch Three | Switch Four | Switch Five | Switch Six
You now have a Young Adult heir and you’re ready to move on to Switch two. Make sure their inventory is empty, because you have to start this Switch with nothing. The first thing you have to do is get him or her ready to play. Go into Manage Worlds:

Then click on Household Management in the top right of your screen:

Once in there, select your Switch One household and click “Split Household”, shown here:

Create a new household:

Take your heir and move them into that new household (this moves their picture to the right side of the screen):

Then click the check mark. It should now look like this:

You may also want to mark your old household as unplayed:

There is no need to move them out, however, since you won’t be changing that apartment again.
Then, move your heir into their first lot: 1313 21 Chic Street. If another sim has moved into this before you get there (which they will do if you’re on “Normal” difficulty), you’ll need to evict that sim like you did when getting ready for the Switch One.


Go into play mode with your heir, and remove all funds. (If you’ve forgotten, it’s typing “testingcheats on”, then “money 0”, then “testingcheats off” into the cheat box opened with control-alt-c.
Now, my suggestion here is saving a second save file using the “save as” menu, just in case you want to start over for any reason. It’s not necessary, just recommended.
Okay, now you’re ready to play and you have three goals in Switch Two:
One: (once again) get your apartment value up to within the target funds amount and move to the next apartment until you get to the last apartment.
Two: (also again) Have your heir ready to start the next Switch. (This was explained in Switch One, refer back there if you’ve forgotten.)
Three: Complete the “City Native” Aspiration on any sim in your household other than the heir. That means you do not have to do that aspiration on your main sim, you can pick a spouse or a roommate to do it instead – but it has to be completed. You’ll still need to have it done before the heir ages up, though, or you’ll be doing another generation in these apartments while waiting for the next generation’s heir. (Through this aspiration, you will also be getting level 10 Singing skill.)
The notes from the last switch still apply to this one. If you’ve forgotten, refer back to Switch One.
This challenge will be considerably tougher, as it’s the first time you will actually have to save some money before moving to the next apartment. (The apartment in question is the last one. This is pretty much all due to the 25k deposit for the apartment which, combined with the rent will eat up all your money from selling the furniture in the last apartment.) Feel free to move whenever you want, just remember you may be stuck furniture-less if you move without extra funds!
District: Fashion District
Lot Trait: Needs TLC
Rent per week: 300
Deposit: 600
Target Value: 8,000 - 10,000 simoleons
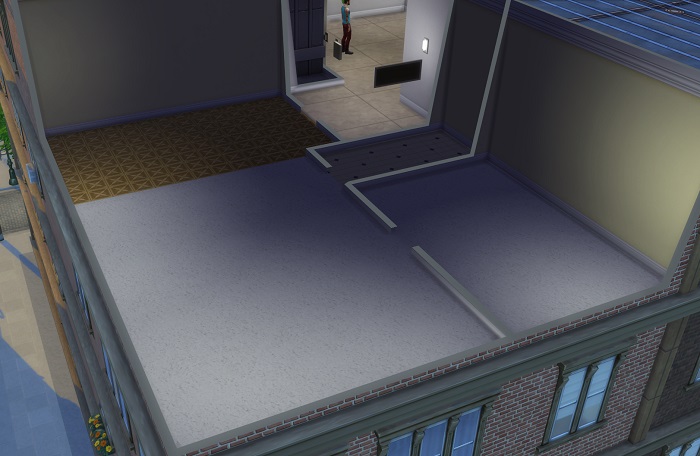
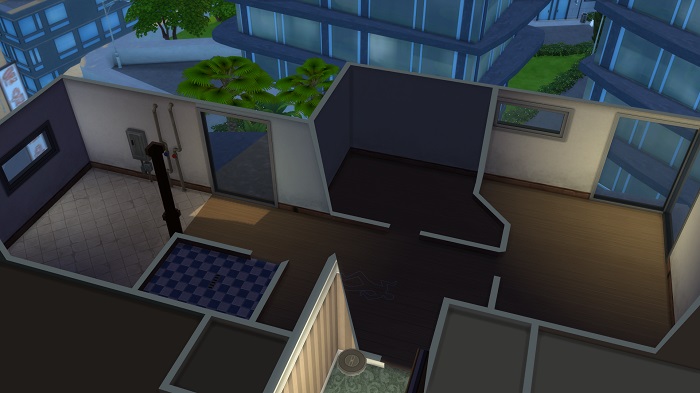
Arguably the worst apartment in the game due to what looks like a body chalk outline on the floor in the middle of the entryway. You’re left to wonder who died here! It doesn’t help that, in addition to the rats, roaches, wiring and plumbing problems, the apartment is a really weird shape, so it’s hard to decorate. The game says it’s supposed to be a 2 bedroom 1 bathroom apartment, but that doesn’t leave you much room for living space.
District: Fashion District
Lot Trait: Lively Neighbors
Rent per week: 500
Deposit: 1,000
Minimum Move in Amount: 8,000 - 500 - 1,000 = about 6,500 for
furniture
Target Value: 16,000 - 18,000 simoleons
This apartment is right next door, so you’re not moving far. It was EA-designed for 2 bedroom, 1 bathroom.. and it’s TINY. Expect to have an interesting time trying to fit all the furniture you want into this dinky little apartment. For extreme players, have fun figuring out where you want the walls! If you’re having trouble getting to the target value, don’t forget decorations and artwork on the walls and upper kitchen cabinets.
District: Fashion District
Lot Trait: Home Studio
Rent per week: 1,200
Deposit: 4,800
Minimum Move in Amount: 16,000 - 1,200 - 4,800 = 10,000
Target Value: 30,000 - 32,000
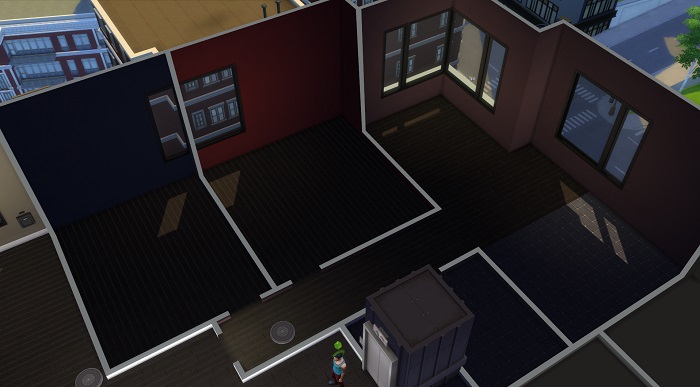
Designed for 2 bedrooms, 2 baths, this is another strangely shaped apartment. Luckily you have at least a little bit more room to spread out, though. I, personally, chose to move a wall or two, but the layout of the apartment is much easier to deal with than the last two apartments have been. Those on Extreme may find setting up a floor plan to be interesting, partially because the stairs really can only go in one general location. A quirky, but fun spot to build with space for a nice-sized balcony.
District: Uptown
Lot Traits: Great View, Serviced Apartment
Rent per week: 5,000
Deposit: 25,000
Minimum Move in Amount: 30,000 - 5,000 - 25,000 = 0  In other words,
you will want to save up probably around 8,000 for furniture (unless
you want more) before moving in.
Target Value: 100,000
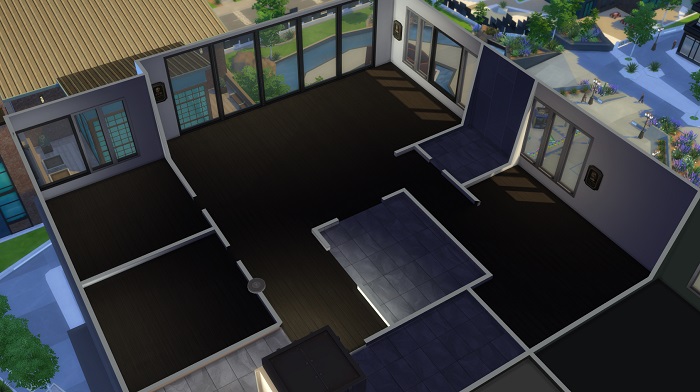
This is the first apartment in the Apartment Switch where you’re best off actually taking some time to save up before you move in. The move-in formula says you’ll be at 0 funds, but that’s not exactly true. I found I ended up with about 4,000 more than I had saved up, but I wouldn’t lock that number in stone, I’m still not 100% sure what the exact formula is, and it probably also has something to do with the amount of stuff you’re selling. Designed for 2 bedrooms, 2 baths, this apartment is the weirdest shape possible. There’s lots of diagonal walls and a big balcony. When playing on Extreme, this will be a challenge when you’re partitioning out the two floors.. but it also leaves you with a lot of options. There’s plenty of space here, too, which will be really nice after the cramped conditions early on in this Switch. The other awesome thing here is that you have a free maid. Very helpful when having kids! The target value here is high because of the City Living aspiration. Remember that high-skill/value paintings from your sim can easily raise the value without you having to spend a whole lot of money on them.
Just like last time, if you’re doing the challenge on Extreme difficulty, as soon as you hit 100k value with your apartment AND the City Native Aspiration, you’re free to go build your very own Karaoke bar. This also opens this lot for traveling to (so long as you have 1k or more in the bank). Even if your heir isn’t of age yet, you can take a break and build your lot, then come back to playing until your heir is old enough to move on. You’ll be building your bar on this lot in San Myshuno (which should have been sitting here in this sorry state for the entirety of This Switch):

Again, have a good time with it and make it your own!
Once you have minimum in value on your apartment, AND you have completed the City Native aspiration on one of your sims, you only need to raise your heir to the Young Adult age. Once your heir has this birthday, pause immediately and save your game. You’ll want to have as much time for the next challenge as possible.
You did it! Now that you have your just-aged-up Young Adult heir, and you completed the above apartments, you are now ready to move to the next Switch. If you’ve forgotten how to move your heir out, just refer to the top of this page.
Go back to the Main Page | Go Back to Getting Started
Switch One | Switch Two | Switch Three | Switch Four | Switch Five | Switch Six
Today, I went ahead and published the first Switch for the Apartment Switch Challenge. It’s now also linked from my blog, at the left hand menu above the calendar. It’s officially open for a public testing phase… feel free to read the rules and dive right in.
If you’re playing it, I’d love to hear about it. Comment here or message me as IllusoryThrall on the Sims 4 forums and I’ll get back to you ASAP. Questions, comments, concerns.. all are welcome.
I plan to release at least every other week until all six Switches (mini-challenges) are published. I’m trying to give this Switch a little bit of a “soft” launch, without making a topic on the Sims Forums just yet… I want to see if I can get some feedback from testers before I do that, and I also want to make absolutely sure I can keep up with the publishing schedule. I’m in the final stages of testing for this first Switch, just polishing, really, (read: challenge completed and just waiting on my heirs to age up) and will be starting testing on Switch Two in the next couple of days.
EDIT: I plan to fully release Switch One to the Sims 4 forums Sunday, February 19th.
Go back to the Main Page | Go Back to Getting Started
Switch One | Switch Two | Switch Three | Switch Four | Switch Five | Switch Six
Now that your starter sim is all ready to go, you’re ready to play the first Switch. Your “job” now is to make money.. because all you have for your sim is a blank apartment and no funds. If you’re playing on extreme difficulty, you don’t even have any walls in your new apartment!
You now have two goals:
So – your first order of business is to make money. In this switch, how you do so is completely your choice, and that’s where the fun begins.
First, I’ll explain the heir, then I’ll explain what you have to do to complete each apartment to get to the last apartment and “win” this Switch.
Of Note on all Apartment listings:
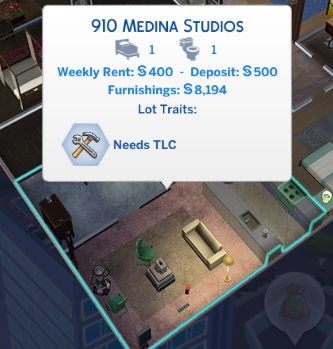
District: Arts Quarter
Lot Trait: Needs TLC
Rent per week: 400
Deposit: 500
Target Value: 8,000-10,000 simoleons
This starter apartment is a real dump. It’s designed for 1 bedroom 1 bath, and there’s no room for more! Plus, there’s rats, roaches, wiring and plumbing issues and sometimes a nasty green goo oozing out of the grate in the floor. It’s also quick and easy to get to the target value. You can move on pretty much as soon as you get there – without saving any extra money – so you won’t have to deal with this apartment for too long!
Once you get to the target value, you’re ready to move your sim to the next lot. Using your sim’s phone, click on the “car” icon, then “Move Household”. Choose the 19 Culpepper House apartment and then click the moving van in the lower right-hand corner of your screen. Then, if you’re playing on Normal difficulty, choose the “sell furniture” and “unfurnished” options, shown here:

If you’re playing on Extreme difficulty, instead of “unfurnished”, choose “bulldoze” (although it should already be bulldozed from your bulldozing spree before starting this challenge.)
District: Spice Market
Lot Trait: Needs TLC
Rent per week: 600
Deposit: 550
Minimum Move In Amount: 8,000 - 600 - 550 = you'll have about
6,850 to spend on furniture.
Target Value: 16,000-18,000 simoleons
This is a considerable upgrade from your last house. Designed for 2 bedrooms 1 bath, there’s even a nice sized balcony! It still has the rats, roaches, and wiring and plumbing issues, but at least you have some room to actually decorate. Also a plus is the fact that you should have quite a “nest egg” from moving to buy furnishings.
District: Arts Quarter
Lot Trait: Home Studio
Rent per week: 1,200
Deposit: 4,800
Minimum Move In Amount: 16,000 - 1,200 - 4,800 = about 10,000 to
spend on furniture
Target Value: 28,000-30,000 simoleons
This apartment is designed for 2 bedroom 2 bath.. and has this really weird wall with a door in it that you can totally walk around. What EA was thinking, I have no idea.. but there’s also a wall in the foyer outside the apartment that they missed painting (it’s got drywall on it.) Pretty funny, really. Furnishing this apartment is a breeze with nicely-sized rooms and a good layout. If you’re playing on Extreme, there’s plenty of room to move the walls around.
District: Uptown
Lot Trait: Great View
Rent per week: 3,750
Deposit: 16,500
Minimum Move In Amount: 28,000 - 3750 - 16500 = about 7,750 to
spend on furniture
Target Value: 40,000+ simoleons (there's no value cap on any final
house, so feel free to decorate as much as you want!)
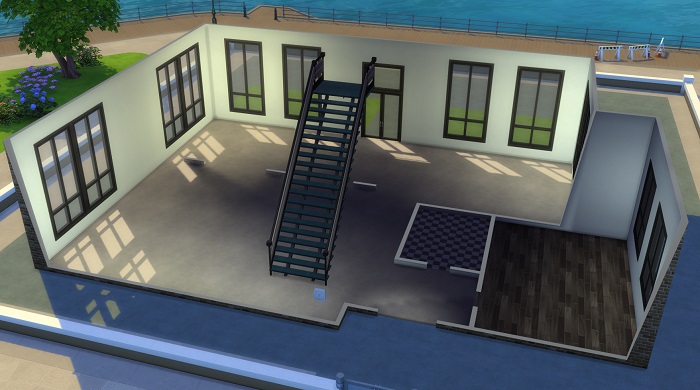
This apartment is the first real building challenge for people playing on “Extreme” difficulty. You’ve got two floors to play with, and no real guidelines. Originally 1 bedroom 2 bath, this also poses a problem for those on “Normal” difficulty and you might very well find that you want to move the wall configuration around to make one of the upstairs rooms a second bedroom. (Which is perfectly alright for you to do!) Tip: Depending on your family size, you may want to save some extra simoleons before moving in, as with only about 8k to spend on furniture, it may be a little tight. The target value on this apartment will take some work to get to, but it’s completely do-able.
If you’re doing the challenge on Extreme difficulty, as soon as you hit 40k value with your apartment, you’re free to go build your very own Arts Center. This also opens this lot for traveling to (so long as you have 250 or more in the bank). You’ll be building your art center on this lot in San Myshuno:

If you’ve never built your own venue, there’s no time like the present to learn. The requirements screen in the top left lot traits menu is really helpful at telling you what you need to make your lot work. Beyond that, it’s all up to you. Have fun with it and name it whatever you’d like.
Once you have 40k minimum in value on your apartment, you only need to raise your heir to the Young Adult age. Once your heir has this birthday, pause immediately and save your game. You’ll want to have as much time for the next challenge as possible.
You did it! Now that you have your just-aged-up Young Adult heir, and you completed the above apartments, you are now ready to move to the next Switch. I’ll show you how to accomplish this in the next Switch page.
Go back to the Main Page | Go Back to Getting Started
Switch One | Switch Two | Switch Three | Switch Four | Switch Five | Switch Six
Go back to the Main Page
Switch One | Switch Two | Switch Three | Switch Four | Switch Five | Switch Six
This is a step-by-step guide to getting your Sim and game set up for playing The Apartment Switch challenge. I tried to include picture tutorials for everything, so that all the things you have to do are easily understood.
There are two difficulties in Apartment Switch – Normal and Extreme. The normal challenge is for anyone who wants to give this challenge a try, no matter your experience with sims. There is no pass/fail with this challenge. If you need to take longer on a particular Switch, that’s perfectly alright, but it will affect your score overall (if, indeed, you decided to keep score). Extreme adds some layers of difficulty and is for more advanced and or brave players who really enjoy building and decorating for your sims.
Your first task is to get a sim ready to move into their new home. There are two basic options for doing this:
This is pretty self-explanatory. Start a “New Game” from the main menu and create your sim. There are no restrictions on traits or aspirations for your sims. Feel free to create them however you see fit. (ON OCCULTS: Cannot be a vampire, however – I explain why later. Aliens and mermaids are okay, though. Mermaid would definitely make things difficult/interesting, but because they do age, they’re not disallowed. Spellcasters may be a bit cheat-y with all their spells, and the immortality potion is NOT allowed, but I’ll leave their inclusion up to you. As for Werewolves, they’re allowed, but the Immortality perk is banned for this challenge.) One of the Switches does require completing a specific aspiration, but that’s not to say you can’t change out and work on other aspirations. Careers aren’t picked in CAS, so we’ll discuss those later.
If you’re coming right off of, say, the Drifter Challenge House 24 (the final house) or Build Newcrest, you can just continue that family and or story by using an heir from the final house/build.
Do keep in mind, though, that they can’t be older than the first day of their Young Adult stage. I’m not restricting how much they have in skills.. but be smart about it. The challenge won’t be fun to play if there isn’t a challenge, so using a “super-sim” (one with really high skills) will be detrimental to your challenge. As in Option A, there are no restrictions on traits or aspirations. Feel free to create them however you want. Three, they cannot be a vampire – I explain why later. (Aliens are okay, however.) Careers are discussed later.
Also, you have to start with a single sim, so bringing other household members from past challenges is a no-no. (Also, no bringing in past household members to your family after starting the Apartment Switch Challenge. Sims you move in must be either game-created – i.e. NPCs or Townies – or brand new “starter” sims that you pre-populated the world with.) To achieve this, split your previous challenge’s household to separate the heir, and then you’re ready to go on.
Once you have your sim created to your satisfaction, save them and move them into Bargain Bend in Willow Creek, shown here:

They’re not going to stay there, but you have some set-up to do before you move them into their first apartment and start playing.
There are a few things you need to do before starting play in your challenge. Remember, our starter sim is still in Bargain Bend in Willow Creek.
Then, go into San Myshuno:

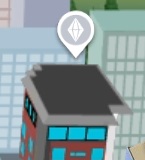
2. Evict all sims living in apartments in San Myshuno. Yes, all of them. Eventually you’ll be building/decorating those apartments too, so it’s easier just to make them empty to start with. To do this, click any apartment that has a grey plumbbob over it:

then evict the household through the bottom right menu:

Do this for all the sims living in San Myshuno. There’s no need to delete the evicted households, but you can if you want.
No changes need to be made to any other neighborhood. If you choose, they can even be completely empty.
3a. If you’re playing on Normal, you’re ready to move your sim now. Move them from Bargain Bend in Willow Creek to 910 Medina Studios in San Myshuno. This can be done either in manage worlds or by going into play mode and moving them with the phone.

Either way, you move into the apartment unfurnished:

3b. If you’re playing on Extreme, it’s best to take the time and bulldoze all lots in San Myshuno. To bulldoze, click on the lot, then the “build” button in the lower right hand corner:

Then, once it loads, click the bulldoze button in the top middle of your screen:

Then, lastly, back to manage worlds in the upper right of your screen:

Repeat this for all San Myshuno lots – yes, that even includes the commercial lots!
You will need to place elevators, mailboxes, and trash cans on the two penthouses before exiting build mode on those two lots. (The third “penthouse” is actually just a regular house building lot, so it doesn’t need them.) To do this, just click the requirement while you’re in build mode:

Then place down each item needed. It doesn’t really matter where you put them in the penthouse (or on Stargazer Lounge, just so that it has those three items there before you leave build mode. The trash chute will require a wall. I stuck down a trash can instead, and it worked, so whichever you do is just fine. For StarGazer Lounge, don’t add anything but those three items, it will show up as an incomplete venue. Your San Myshuno will look like this – terribly bare, but then, that’s the point of the challenge!

Finally, move your sim into 910 Medina Studios:

Move your sim in with the “bulldoze” option selected:

4. Set Game Options as follows:


Autonomy: Full, Auto age (played sims): yes, Auto age (unplayed sims): checked, Sim Lifespan: Normal, and Fill Empty Homes: Checked.
The challenge ui and traditional social menus are up to your personal preference, as are the other options available.
5. Now, go to play mode with your sim and hit pause. Use control-alt-c to bring up the cheat box:

Type in “testingcheats on”, then “money 0” then “testingcheats off”. Use control-alt-c again to make that cheat box close. You should have seen all your sim’s money magically disappear.
6. You’re all ready, now go to the Switch One page to find the rules for your first Switch challenge. I put each Switch on a separate page so those who don’t want spoilers of what’s coming will be safe.
Go back to the Main Page
Switch One | Switch Two | Switch Three | Switch Four | Switch Five | Switch Six
 November 2025 Dev DiarySuperSweetBot Commands for Mods & BroadcastersOctober 2025 Dev DiaryProgress Report!Hacking Situation ResolvedHey all…Not So Berry Updating
 Jaynie’s Gems: By-The-NumberToday